The one true guide to baking materials in Blender

Real time rendering performance is often limited by 3D assets as much as it's limited by code. Good low poly assets inevitably rely on baking, the process of transferring details from a high poly mesh with a complex material to a low poly one with a much simpler material. Unfortunately, however, there seems to be a lack of info regarding baking around. Especially in Blender, things can sometimes be a bit unintuitive regarding baking. In the process of working on my game, A Short Odyssey (ASO), I came up with a workflow that works quite well for me, so I will share it with you today.
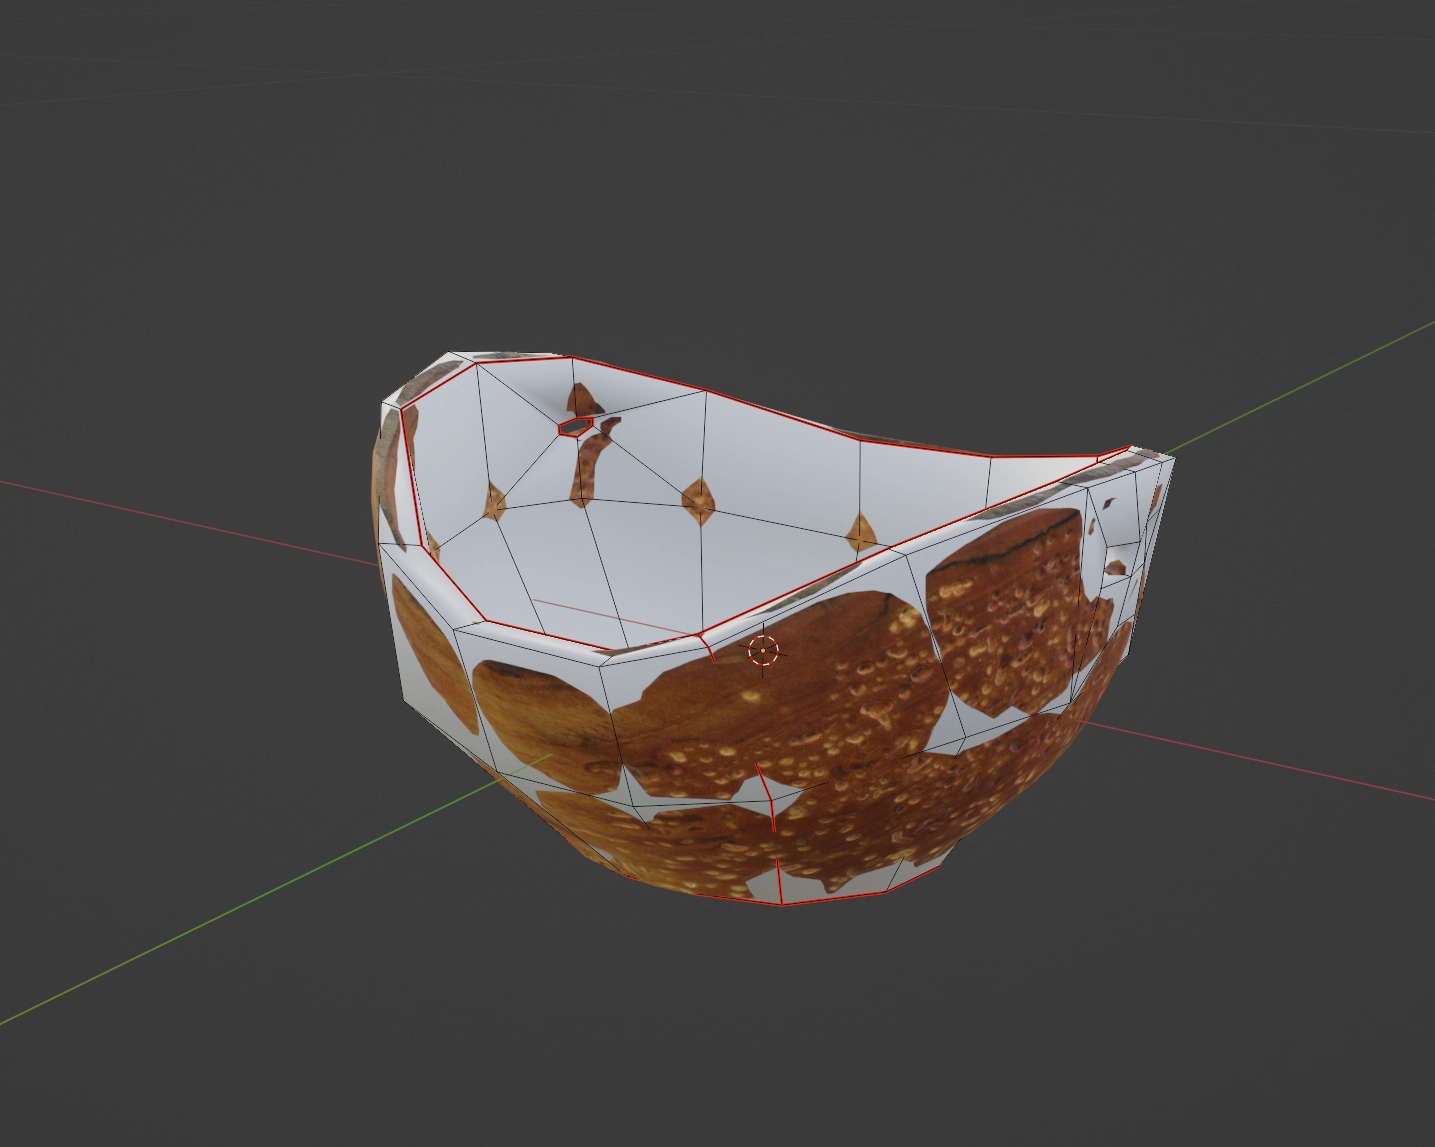
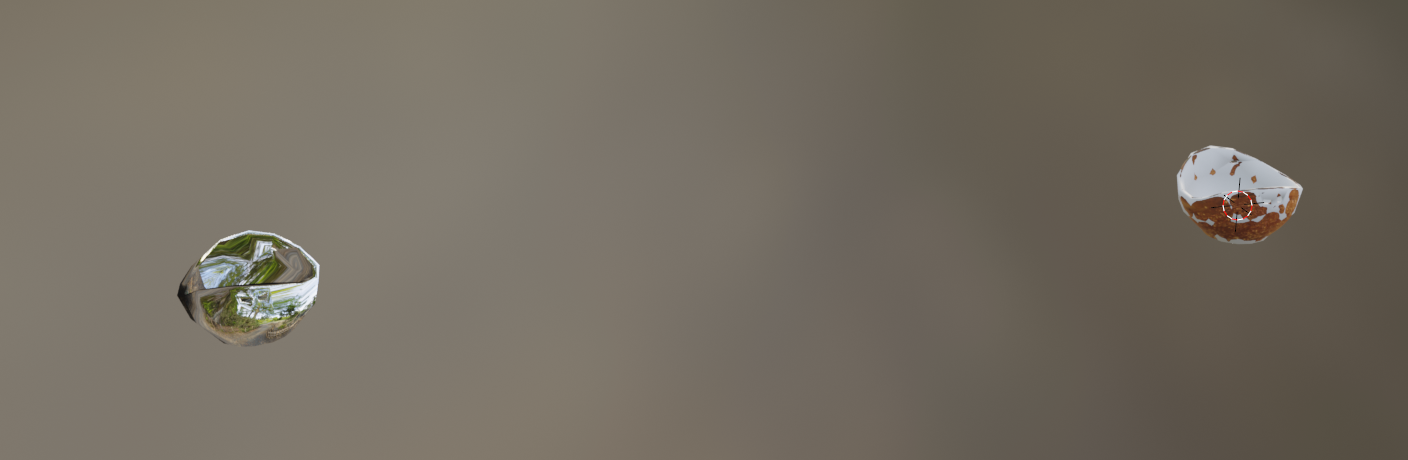
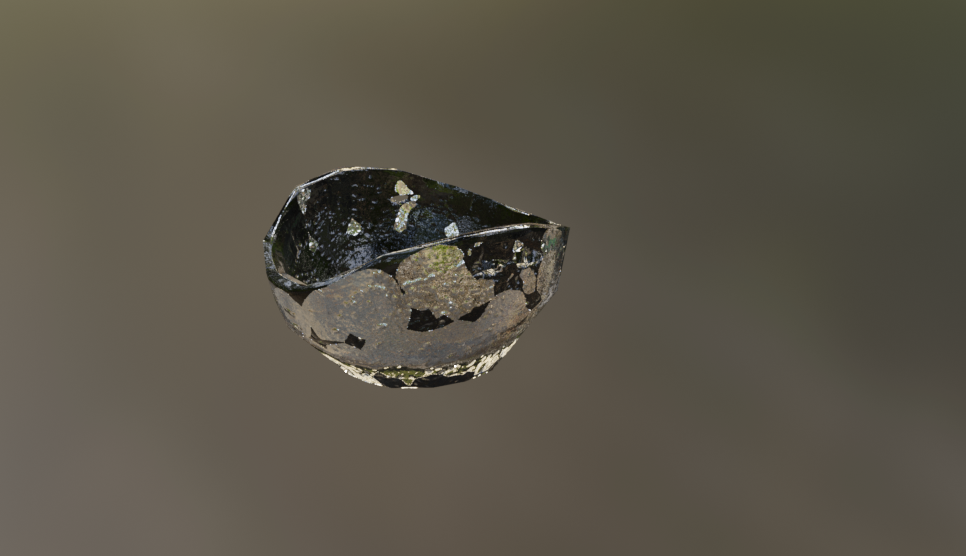
For this tutorial we are going to use this wooden bowl model from the fantastic website Polyhaven.
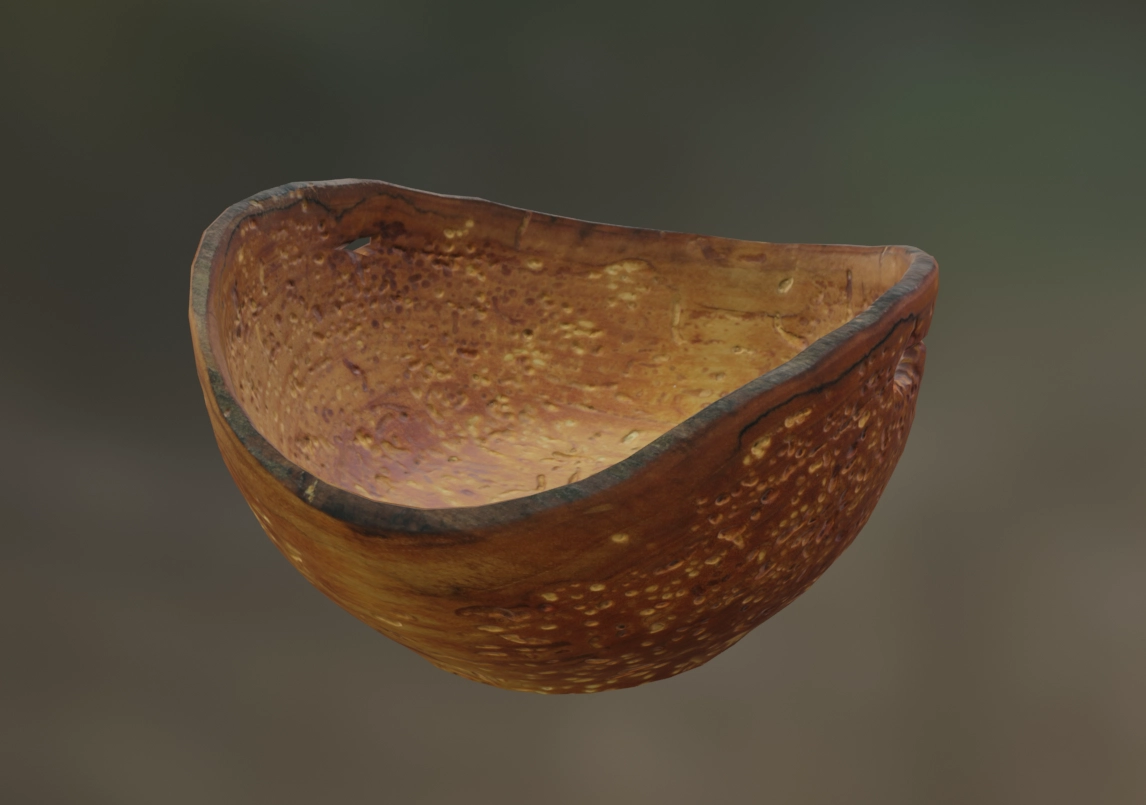
As with all of the free CC0 models on Polyhaven, this mesh has a fairly high number of small triangles. 4,666 to be exact. While that may not seem like a lot think about how big it is likely to be in a real time scene. Most of the time the entire bowl might only be a few pixels tall! Especially given that small triangles are much more expensive than large triangles (due to quad occupancy). This is probably something we should deal with.
Now that we understand why we must bake, let's go ahead and do it.
Open up your high poly model in Blender. I am using Blender 4.4. Other versions should work but your UI might not match up exactly with this tutorial.
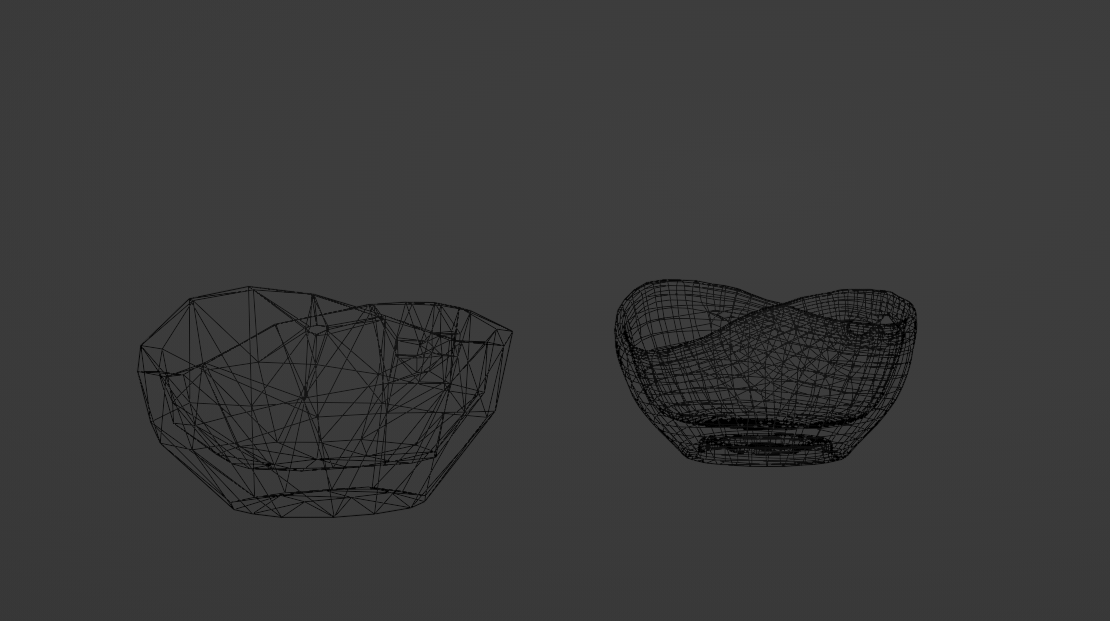
You then will need a low poly version of the model. How to create a low poly model is outside the scope of this tutorial, but it must be UV-unwrapped before proceeding and none of the polygons should be overlapping on the UV map.
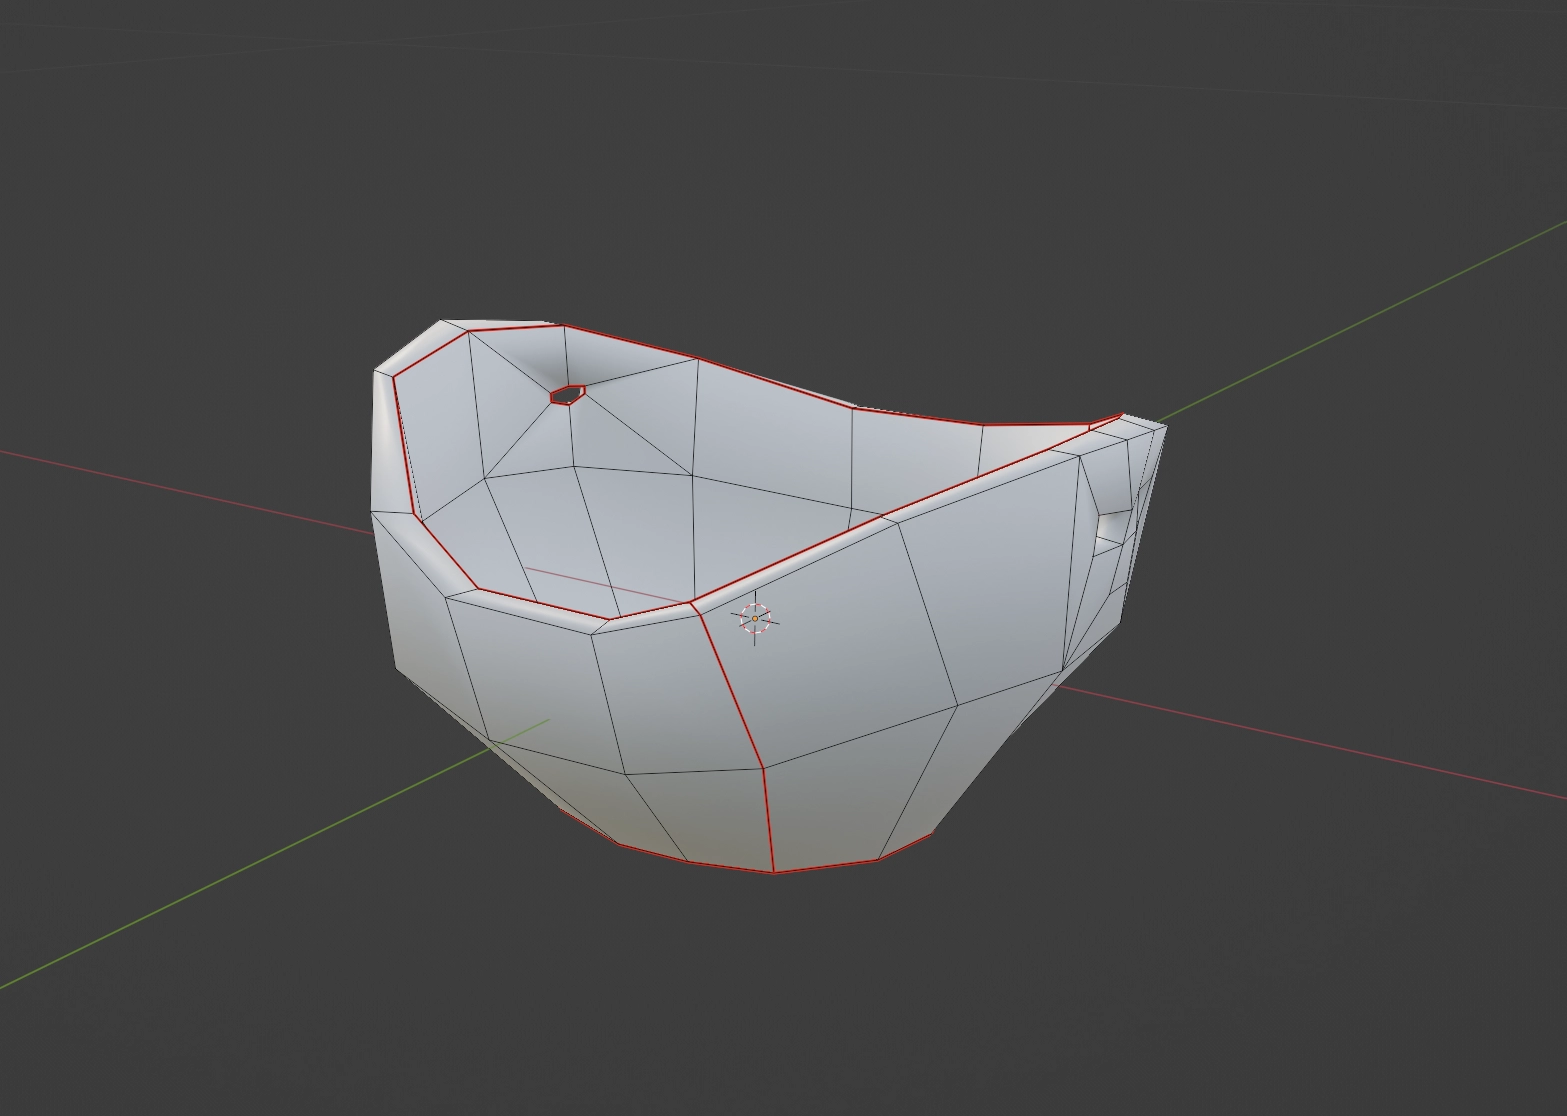
My low-poly version uses only 272 triangles or roughly 5.8% of the original number. These are also bigger triangles so should have much better quad occupancy on the GPU.
The first thing you need to do is make sure the high and low-poly models are directly on top of each other, just like in the image above. You must also ensure the scale of the low poly version is exactly 1.0 on all axes.
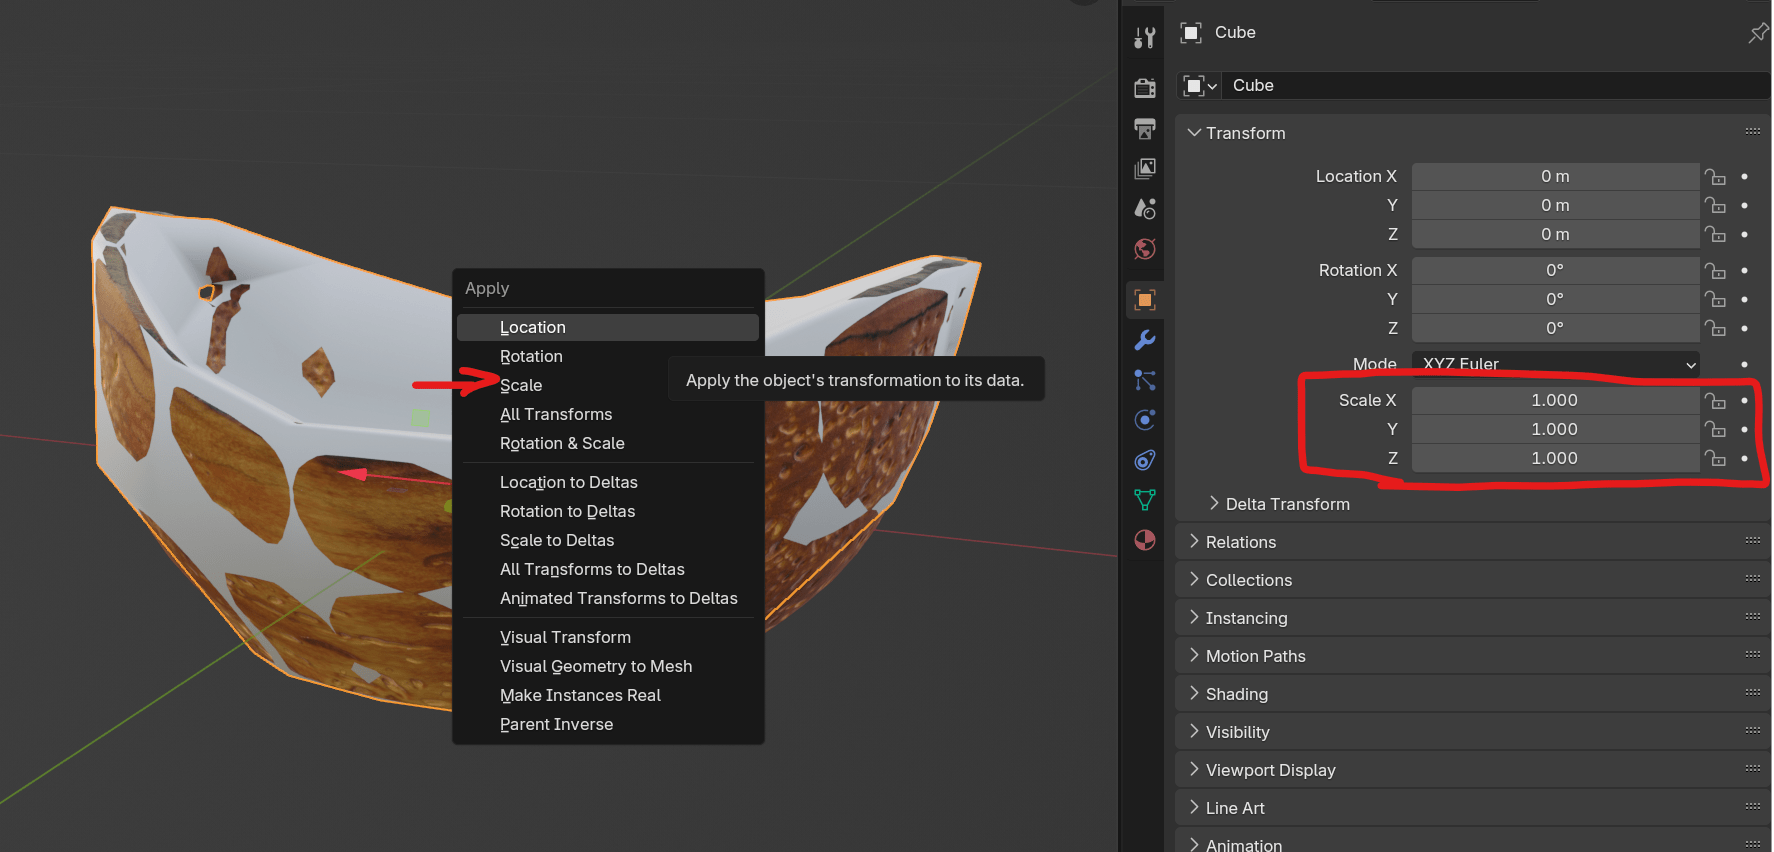
If it is not, you can apply the scale with Ctrl+A -> Apply -> Scale, while the low poly object is selected in object mode.
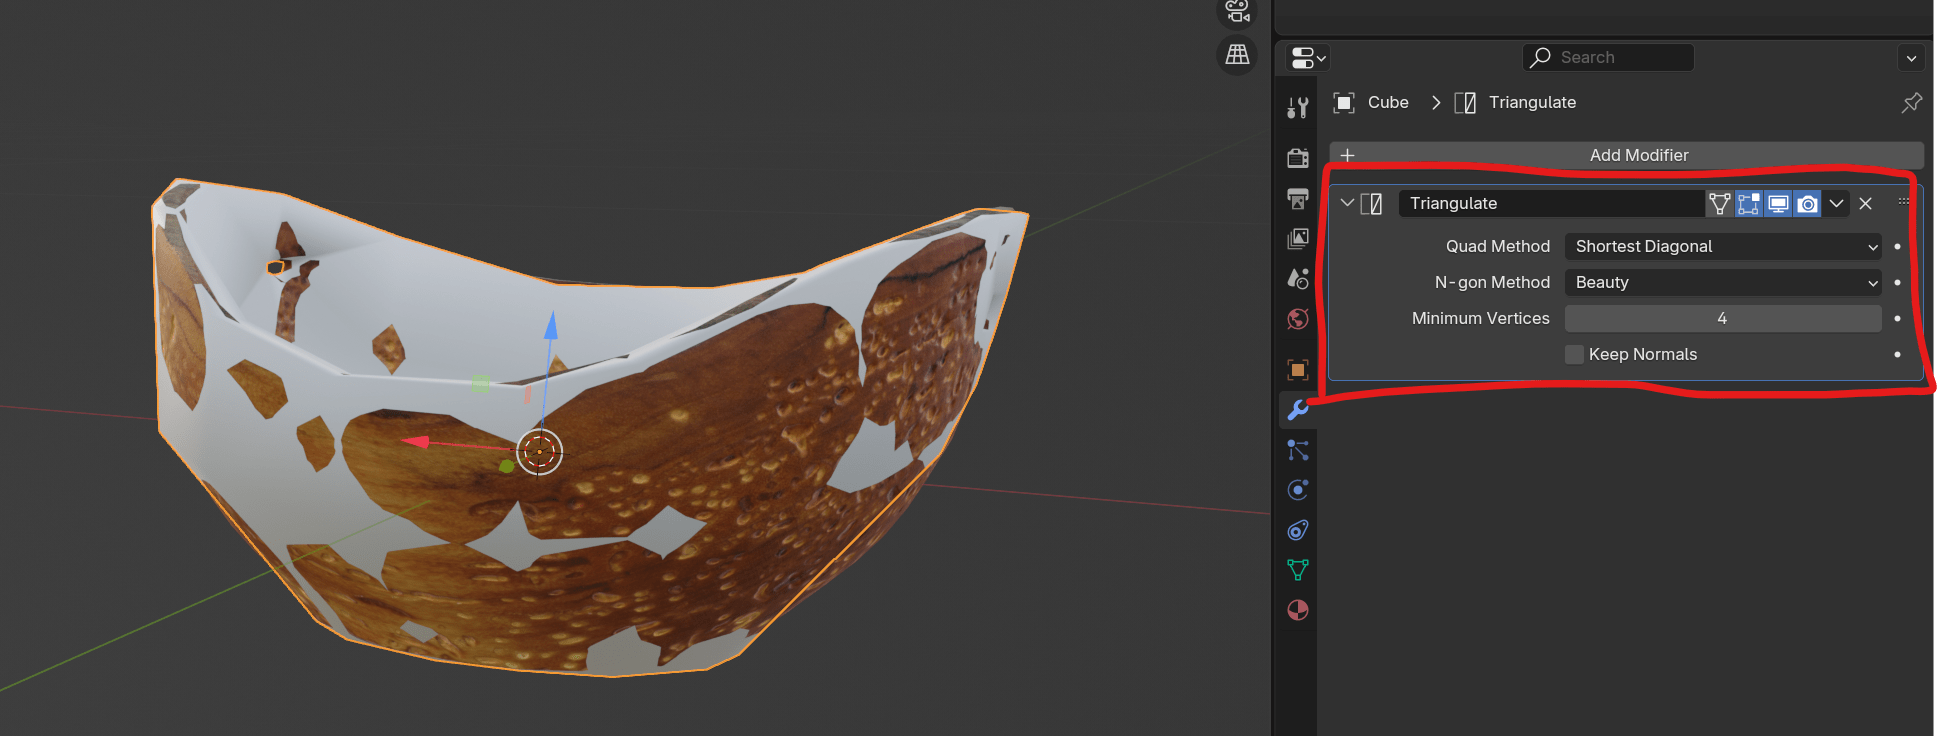
Next, you need to add a triangulate modifier to the low poly object. The exact options you pick here don't really matter, but if you change them after the bake you must re-bake all maps.
Creating a Bake Target Proxy
The main way my workflow differs from what I've seen elsewhere is the use of a Bake Target or Proxy, this is not strictly necessary but it makes the entire process far less frustrating if you need to run the baking process more than once, which you inevitably will. This involves creating a linked duplicate to our low poly object, this will allow you to preview the bake results without having to mess around with the shader nodes and having to reconnect things between bakes.
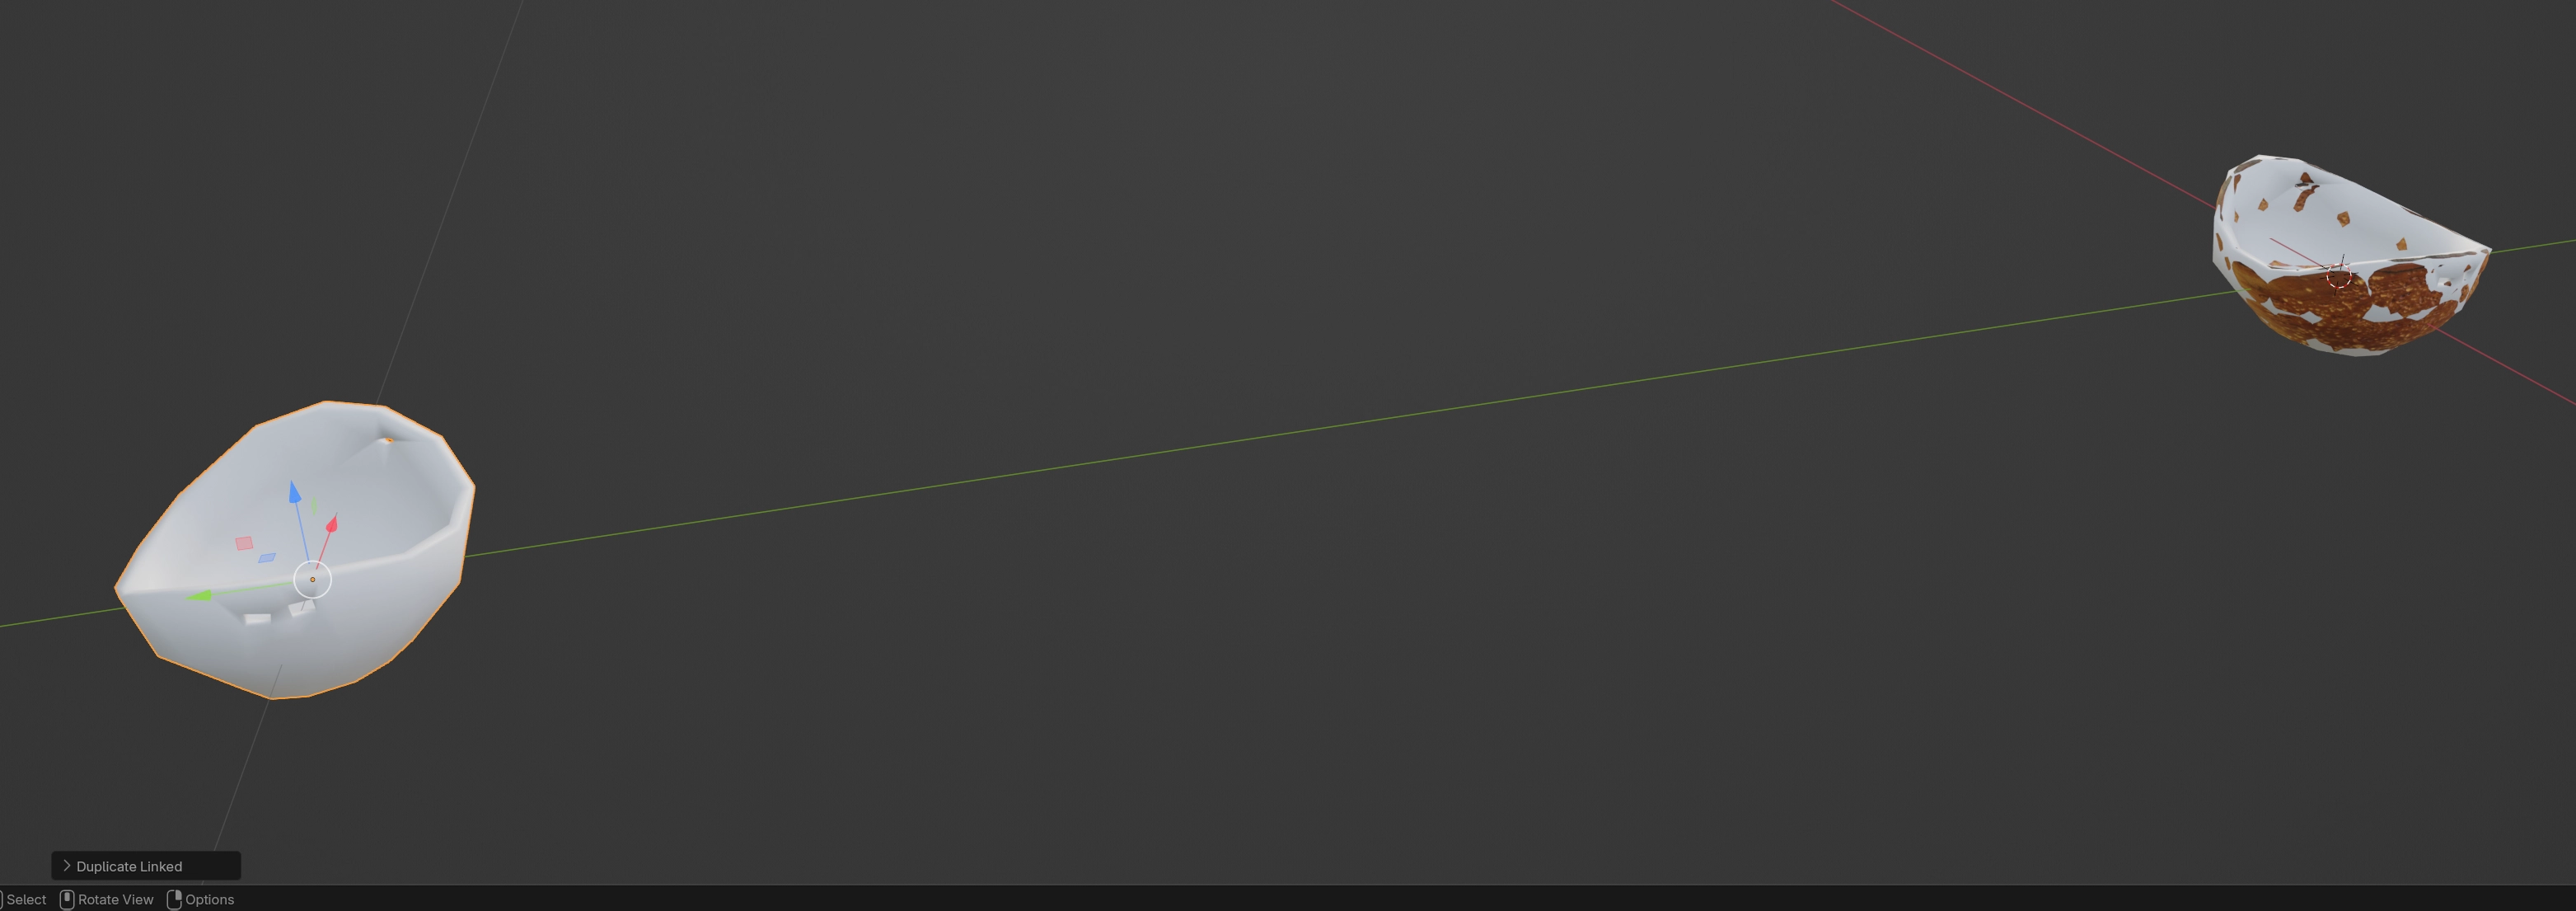
To create a linked duplicate, simply select your low-poly object and hit Alt+D, you can then move your linked duplicate off to the side somewhere.

I'm going to name the new object Low Poly and the first one Bake Target (The names don't matter but it's nice to be organized).
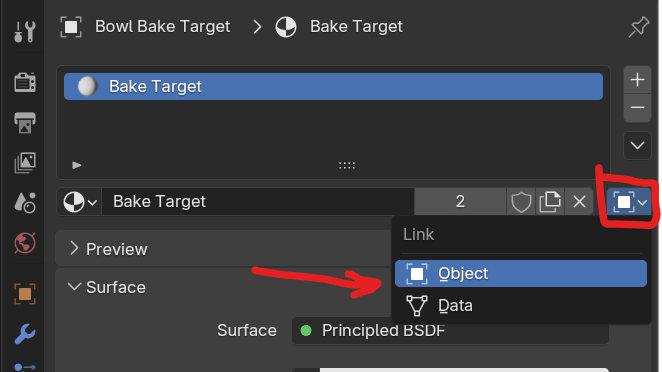
This next part is very important, you must set the Bake Target to source it's materials from "Object" instead of "Data". This way the two linked objects can have different materials. This is done as shown above in the material tab for the Bake Target Object
You can then create a material for it which I will also call Bake Target, I will also create a new material for the Low Poly object and call it Low Poly.
Setting up Materials

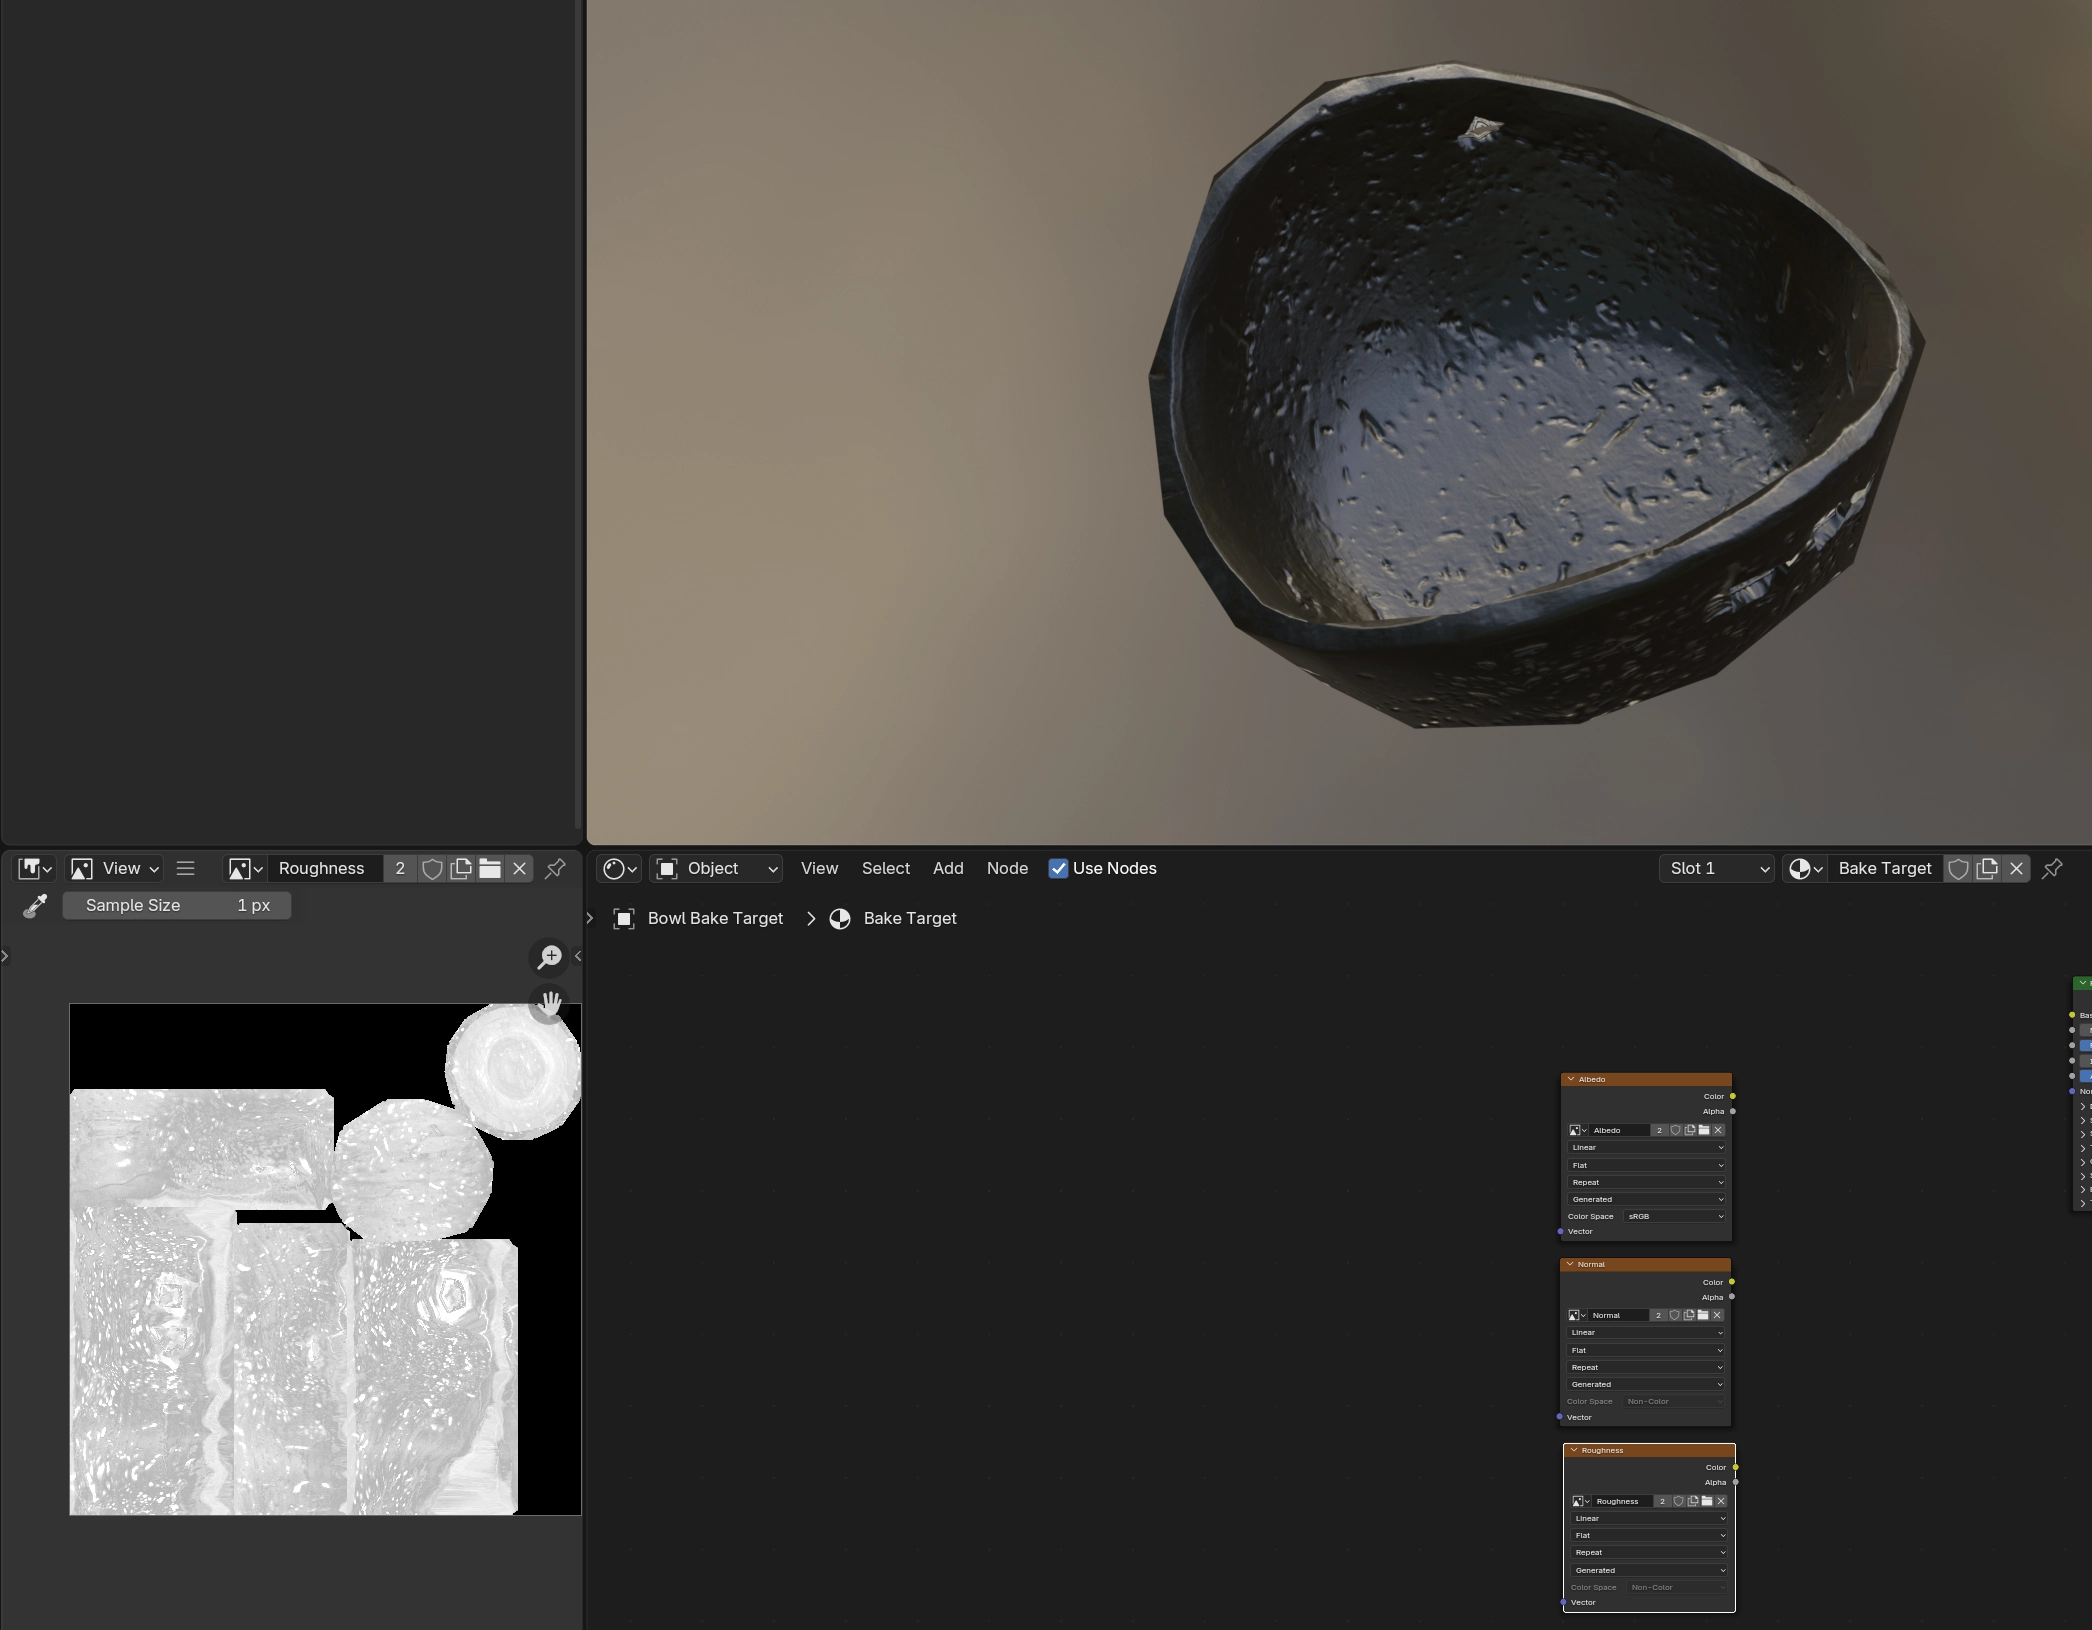
The rest of this process will be done in the shading tab so we can switch there.
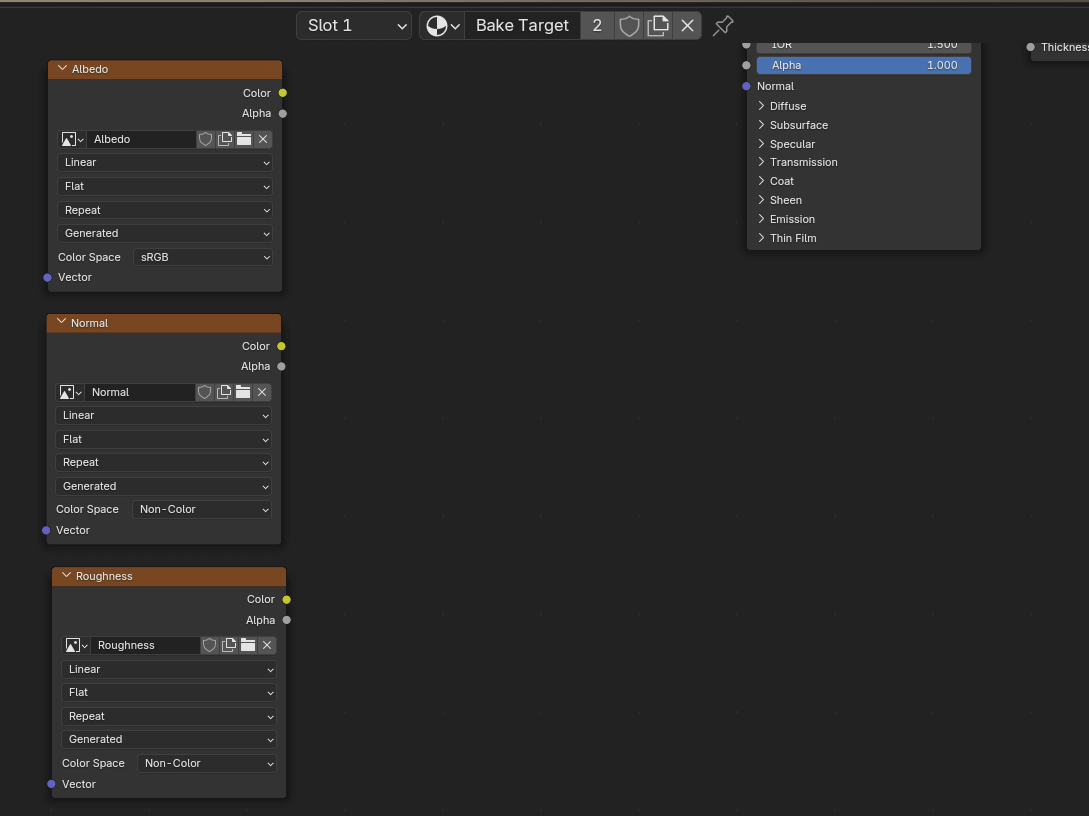
With the bake target selected we will add 3 texture nodes to it's material. Because I'm using a PBR workflow, these will be Albedo, Normal & Roughness (I will get into metalness later in this tutorial). These texture nodes should have their colour space set to "sRGB" for the Albedo and "Non-Color" for the others. You should NOT connect these nodes to anything.
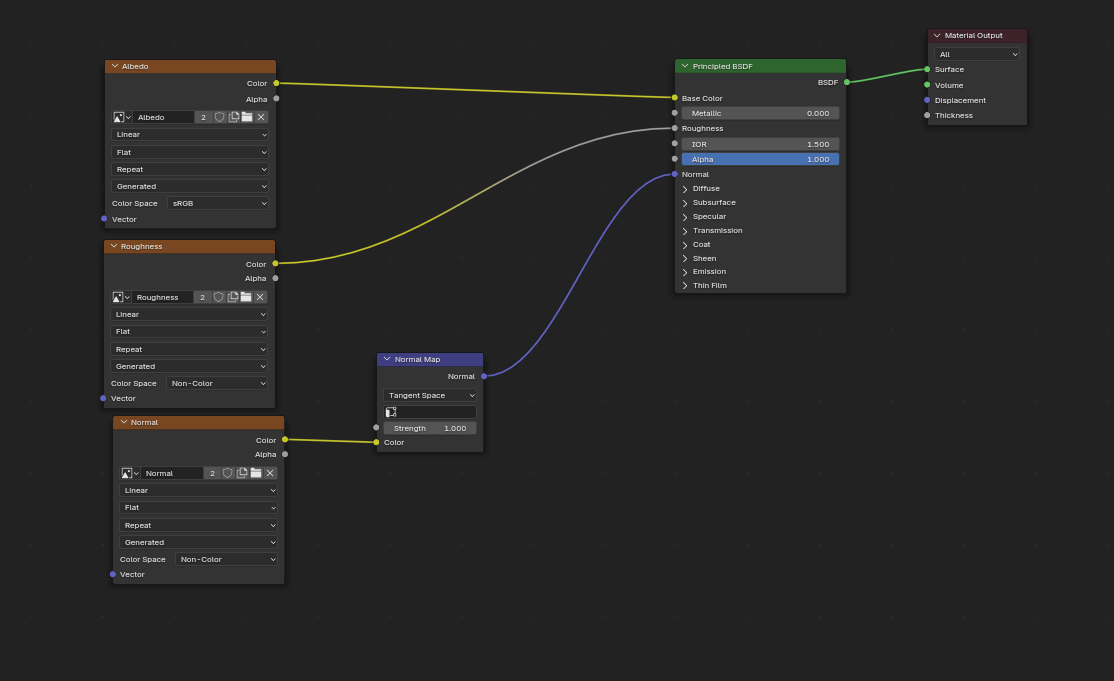
You can then copy & paste these nodes into the material for the Low Poly object. Then connect the nodes like shown here.
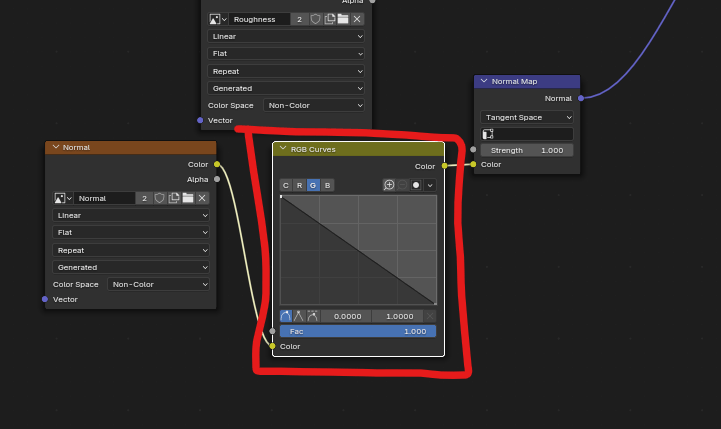
If you use DirectX style normal maps (Like I do in ASO), you will need to add an "RGB Curves" node with the green channel flipped in order to invert the green channel of the normal map.
Your low poly will look weird and shiny, that is because our baked textures are all black at the moment, that is OK. It will look correct after we are done baking.
Now that everything is set up, we can start looking at the actual baking UI.
The Baking UI
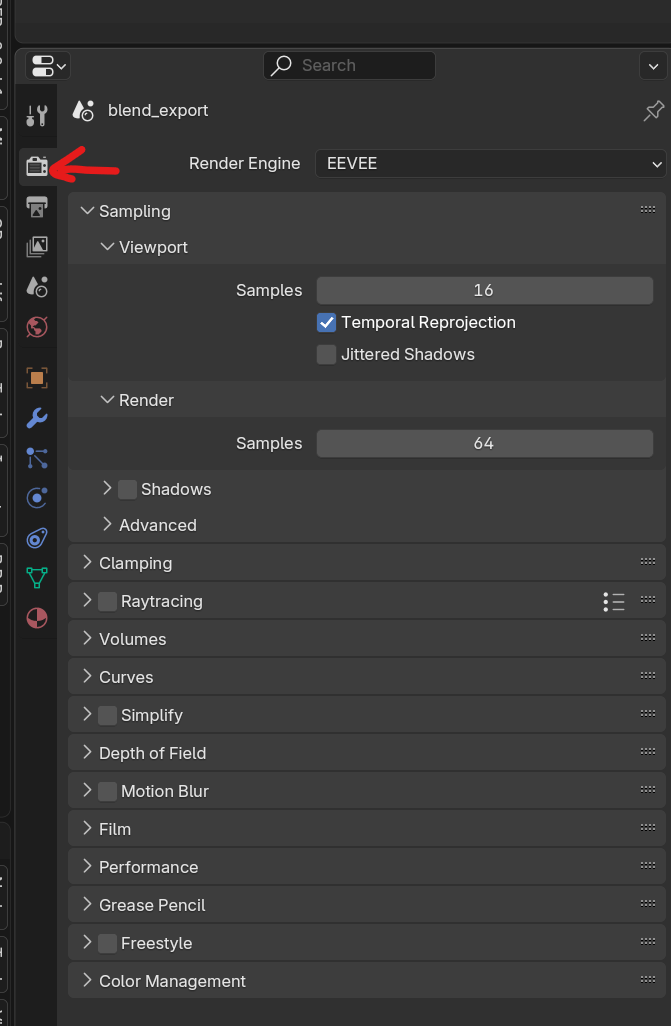
Baking is accessed through the Render tab on the properties panel.
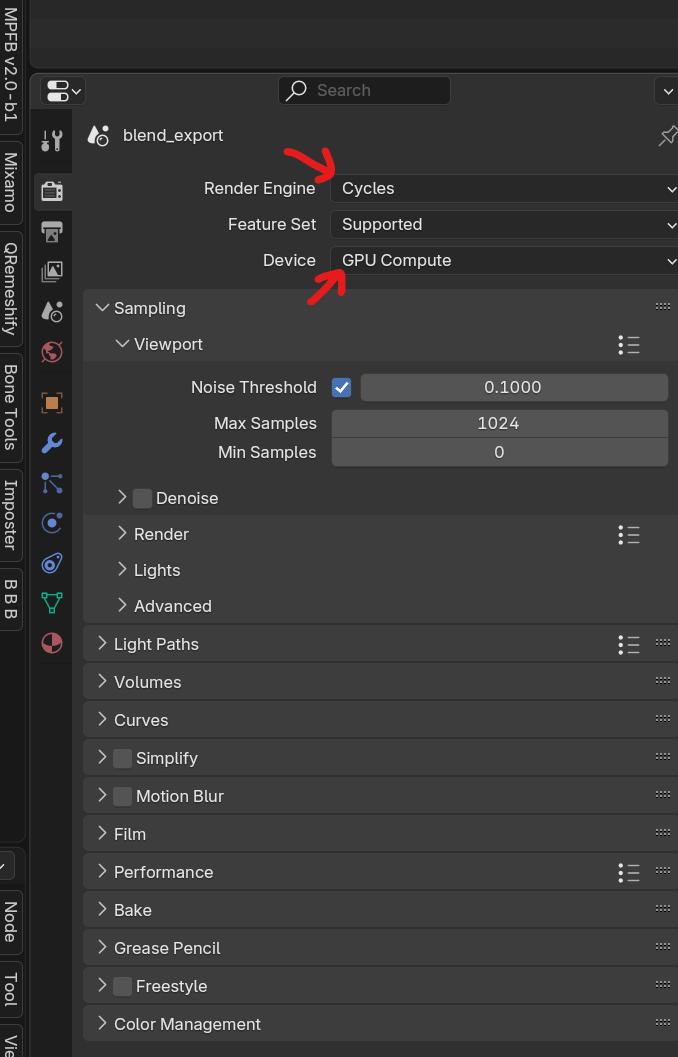
In order to see the bake options you need to set the Render Engine to "Cycles". You probably also want to set Device to "GPU Compute" in order to speed things up.
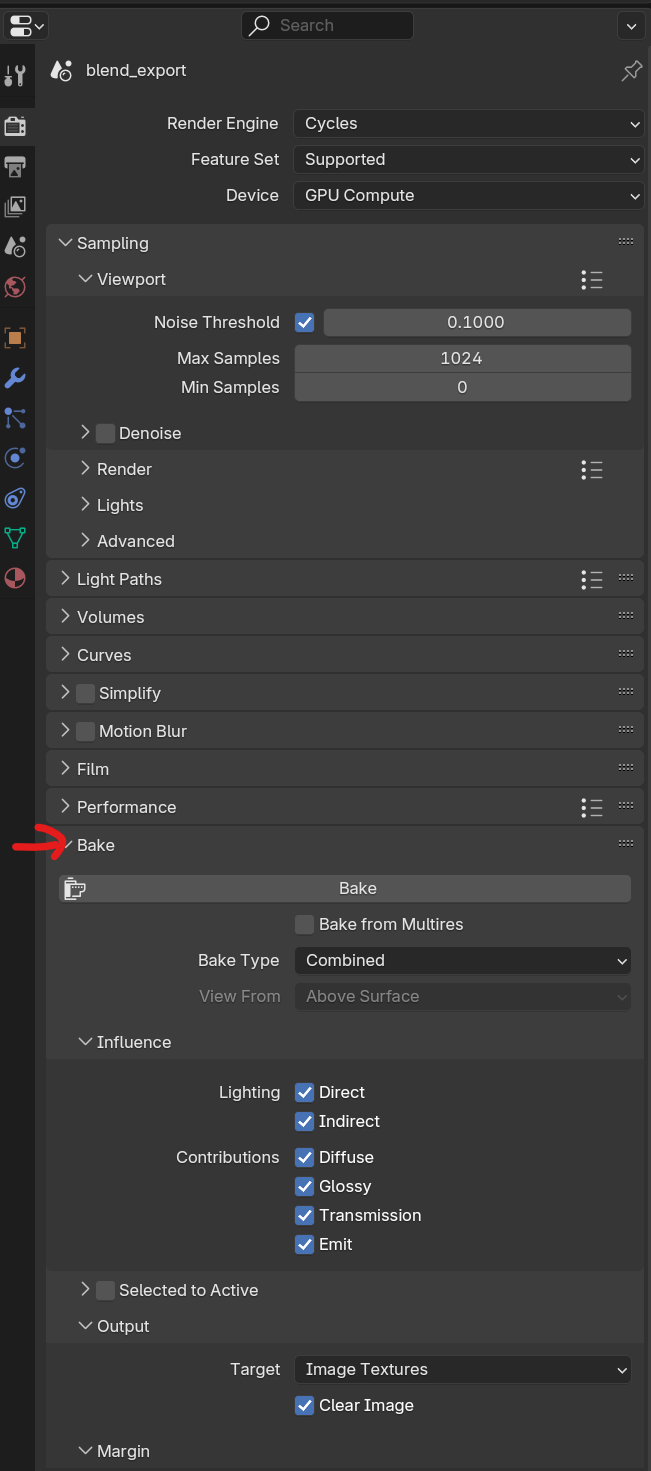
Expanding the bake controls will give you access to several new options.
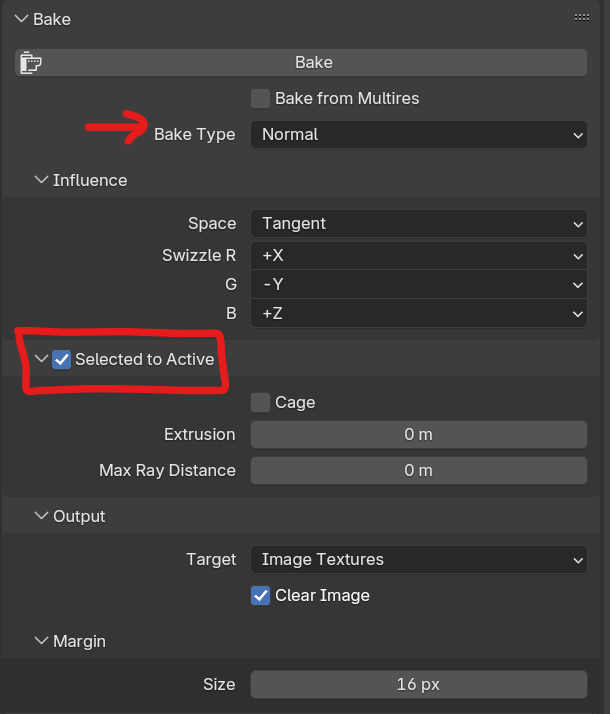
We will start by baking the normal map. To do so we must first select "Normal" from the Bake Type combo box. You will also want to check "Selected to Active". For users of DirectX style normal maps, like myself, you will also need to set the G channel to "-Y". If you are using OpenGL style normal maps you can leave it as is.
Performing the Bake
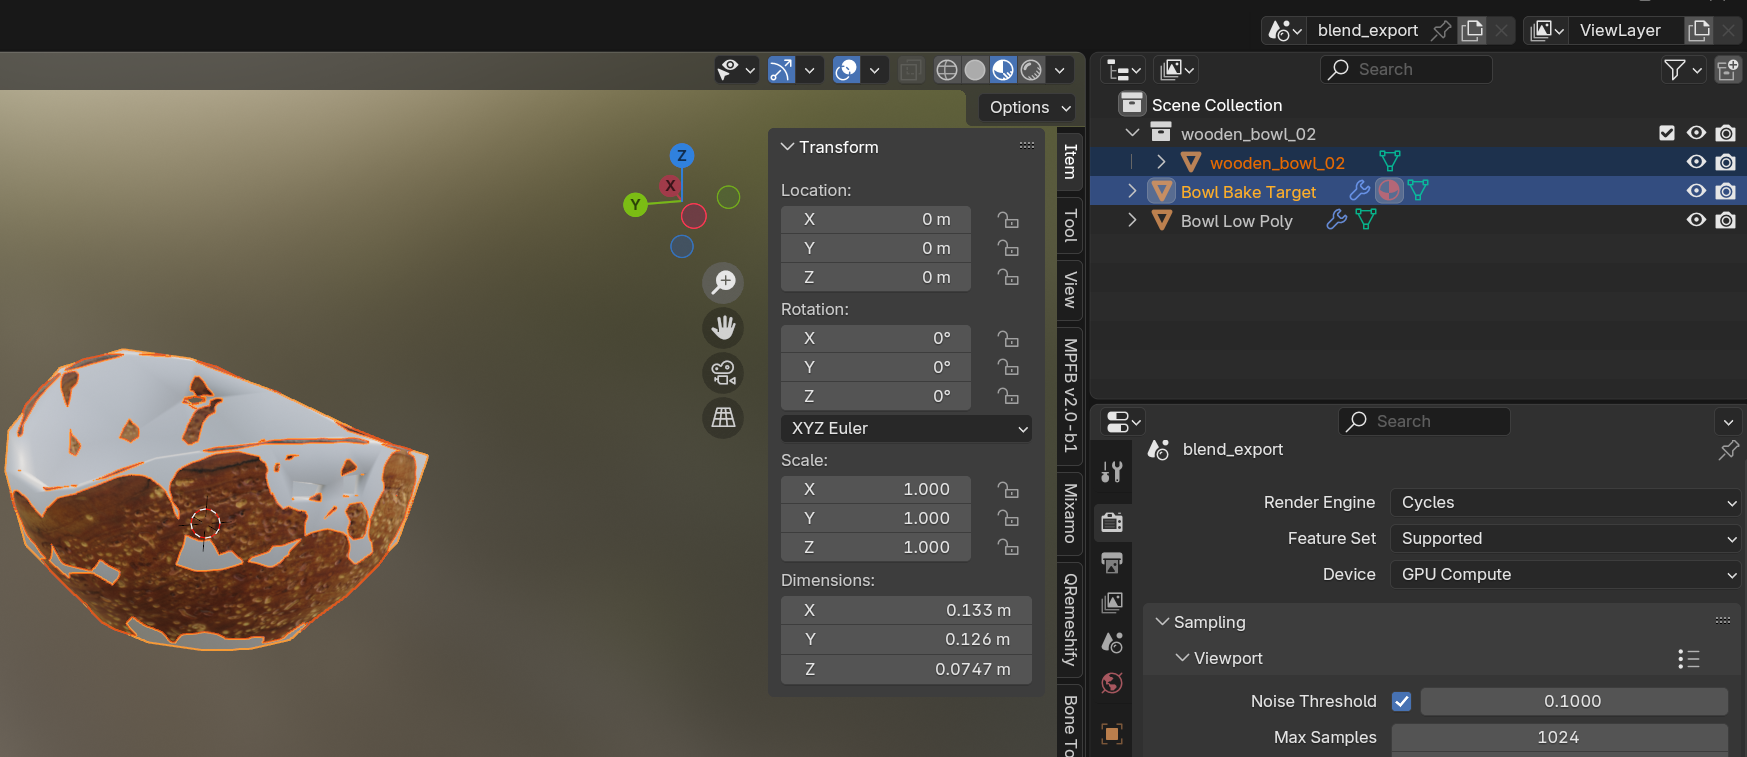
Ok its finally bake time, select your High Poly asset then press Ctrl and select your Bake Target this sets the High poly as selected and your Bake Target as Active. If everything is selected correctly your outliner should look like the image above. With a dark orange highlight on the high poly object and bright orange for the Bake Target.

Now select the normal map texture node in the shader nodes for the current material, this tells blender to use it as the destination for baking.
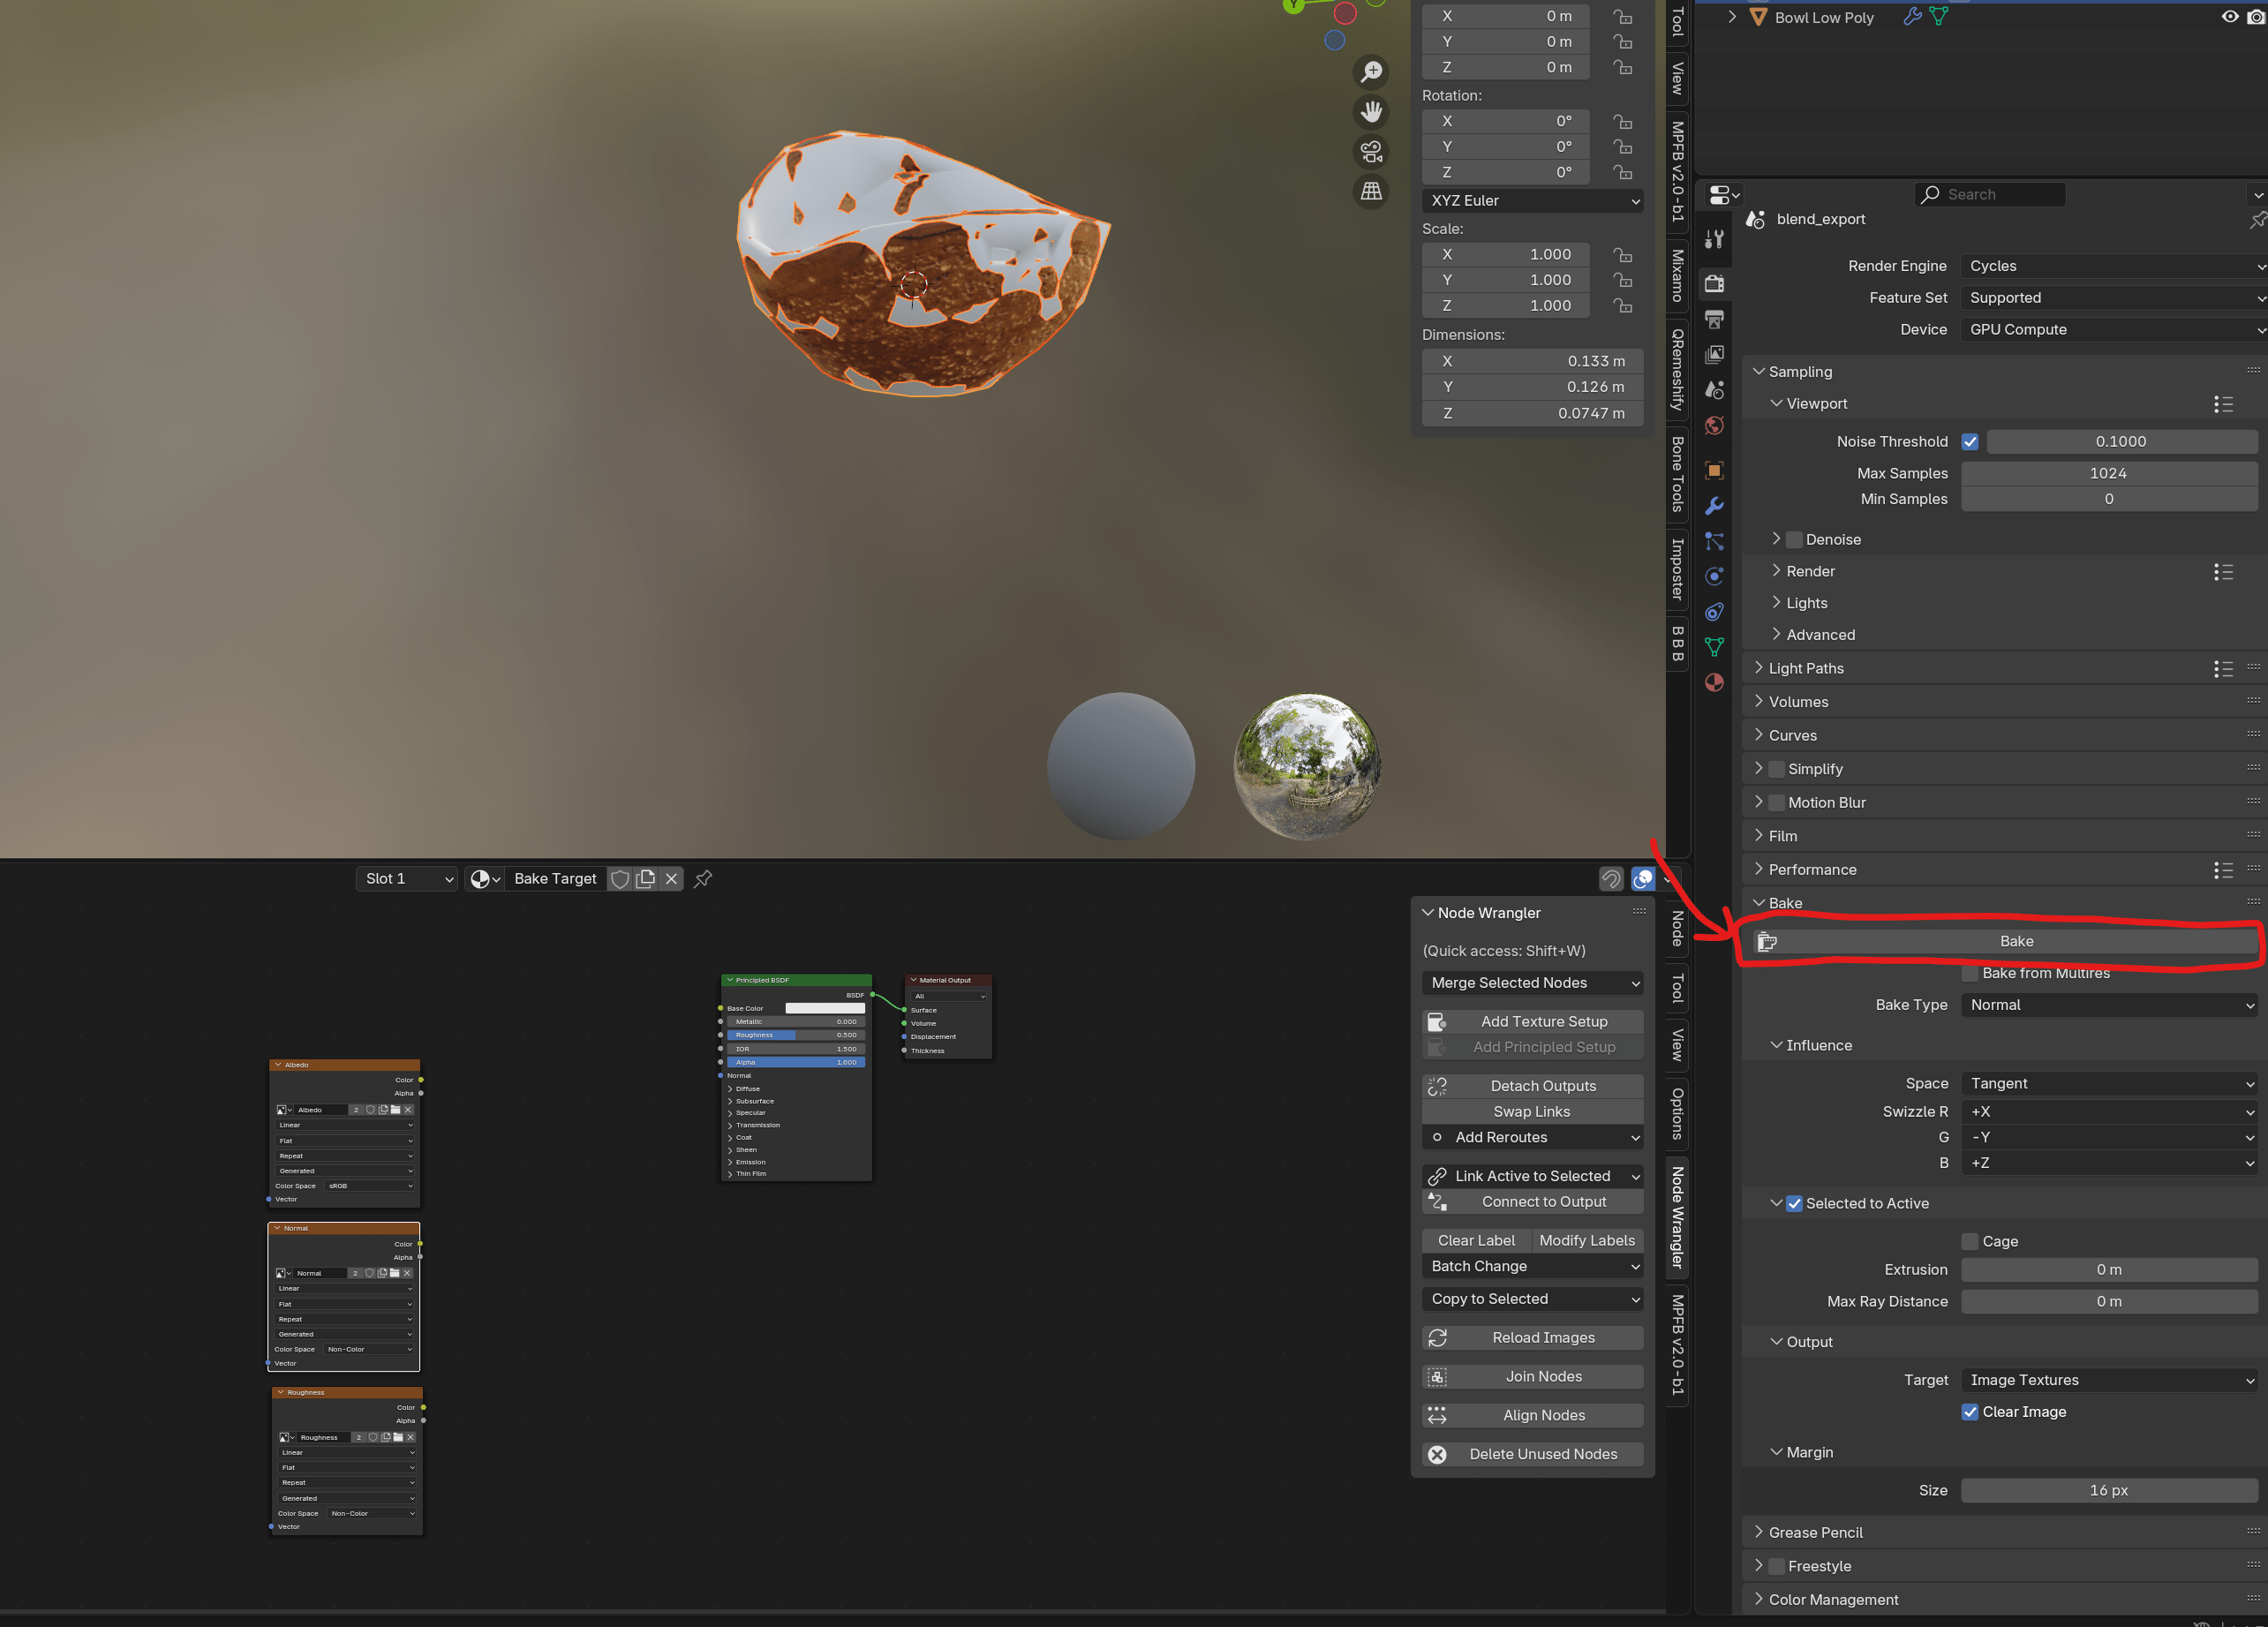
We can finally hit bake!
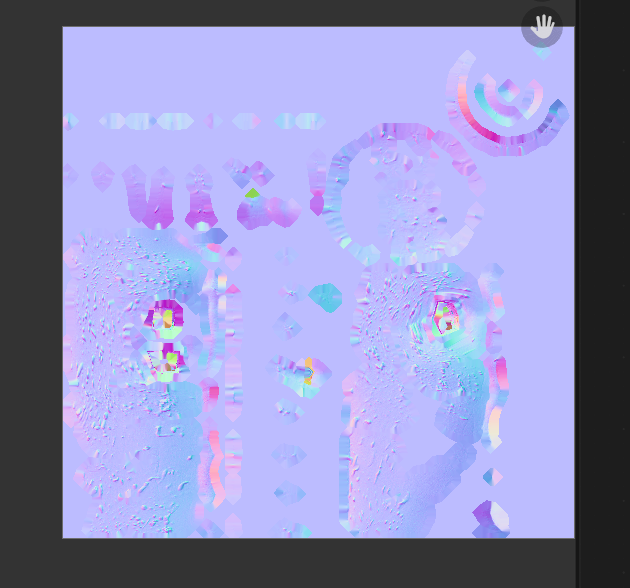
After some amount of processing time, you should see a preview of the normal map. There is also a 99% chance it will be messed up in some way.
As you can see looking at our Low Poly object something is very off.
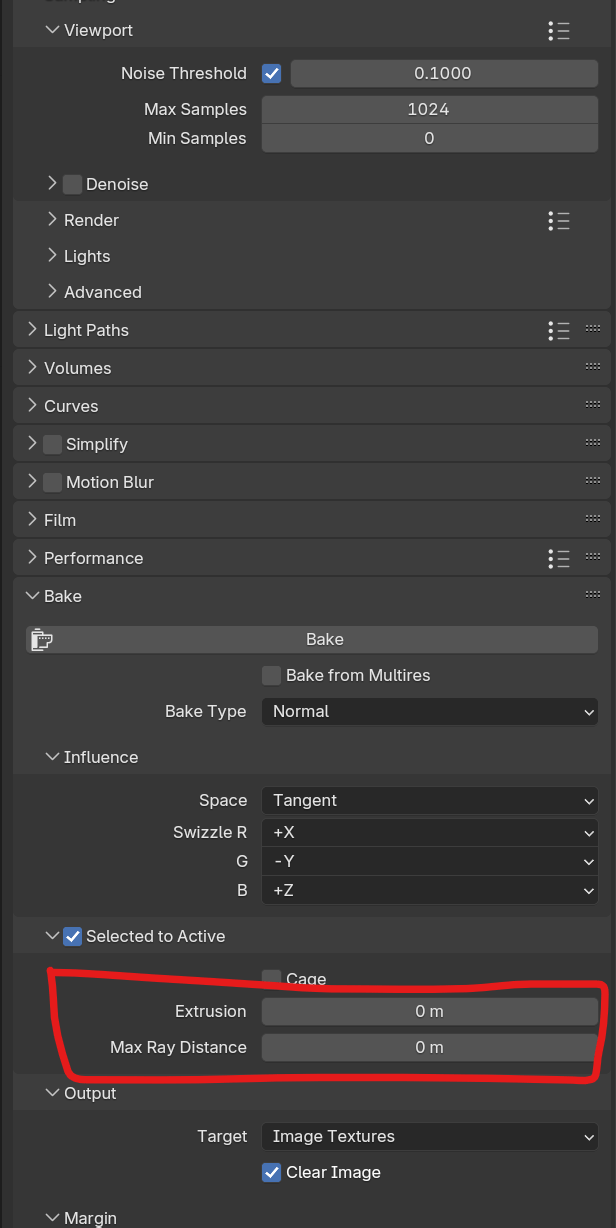
The solution to this problem is adjusting two very important parameters for baking. They are "Extrusion" and "Max Ray Distance".
In Blender baking works by shooting out rays from the Bake Target. Since our Low poly mesh doesn't lie completely outside the surface of the the high poly object we blender needs to effectively extrude the surfaces of the target outward so that the high poly object is completely contained within the low poly one. The amount that it does this is the "Extrusion" and the length of the rays are "Max Ray Distance".
Now of course you are probably wondering at this point, how do I know what to set these numbers to? My rule of thumb is to set extrusion to the smallest value you can that makes the green pixels in the normal map go away. Then set the Max Ray Distance to ~1.5-2 times the Extrusion.

In this case 0.1 and 0.2 are good values.
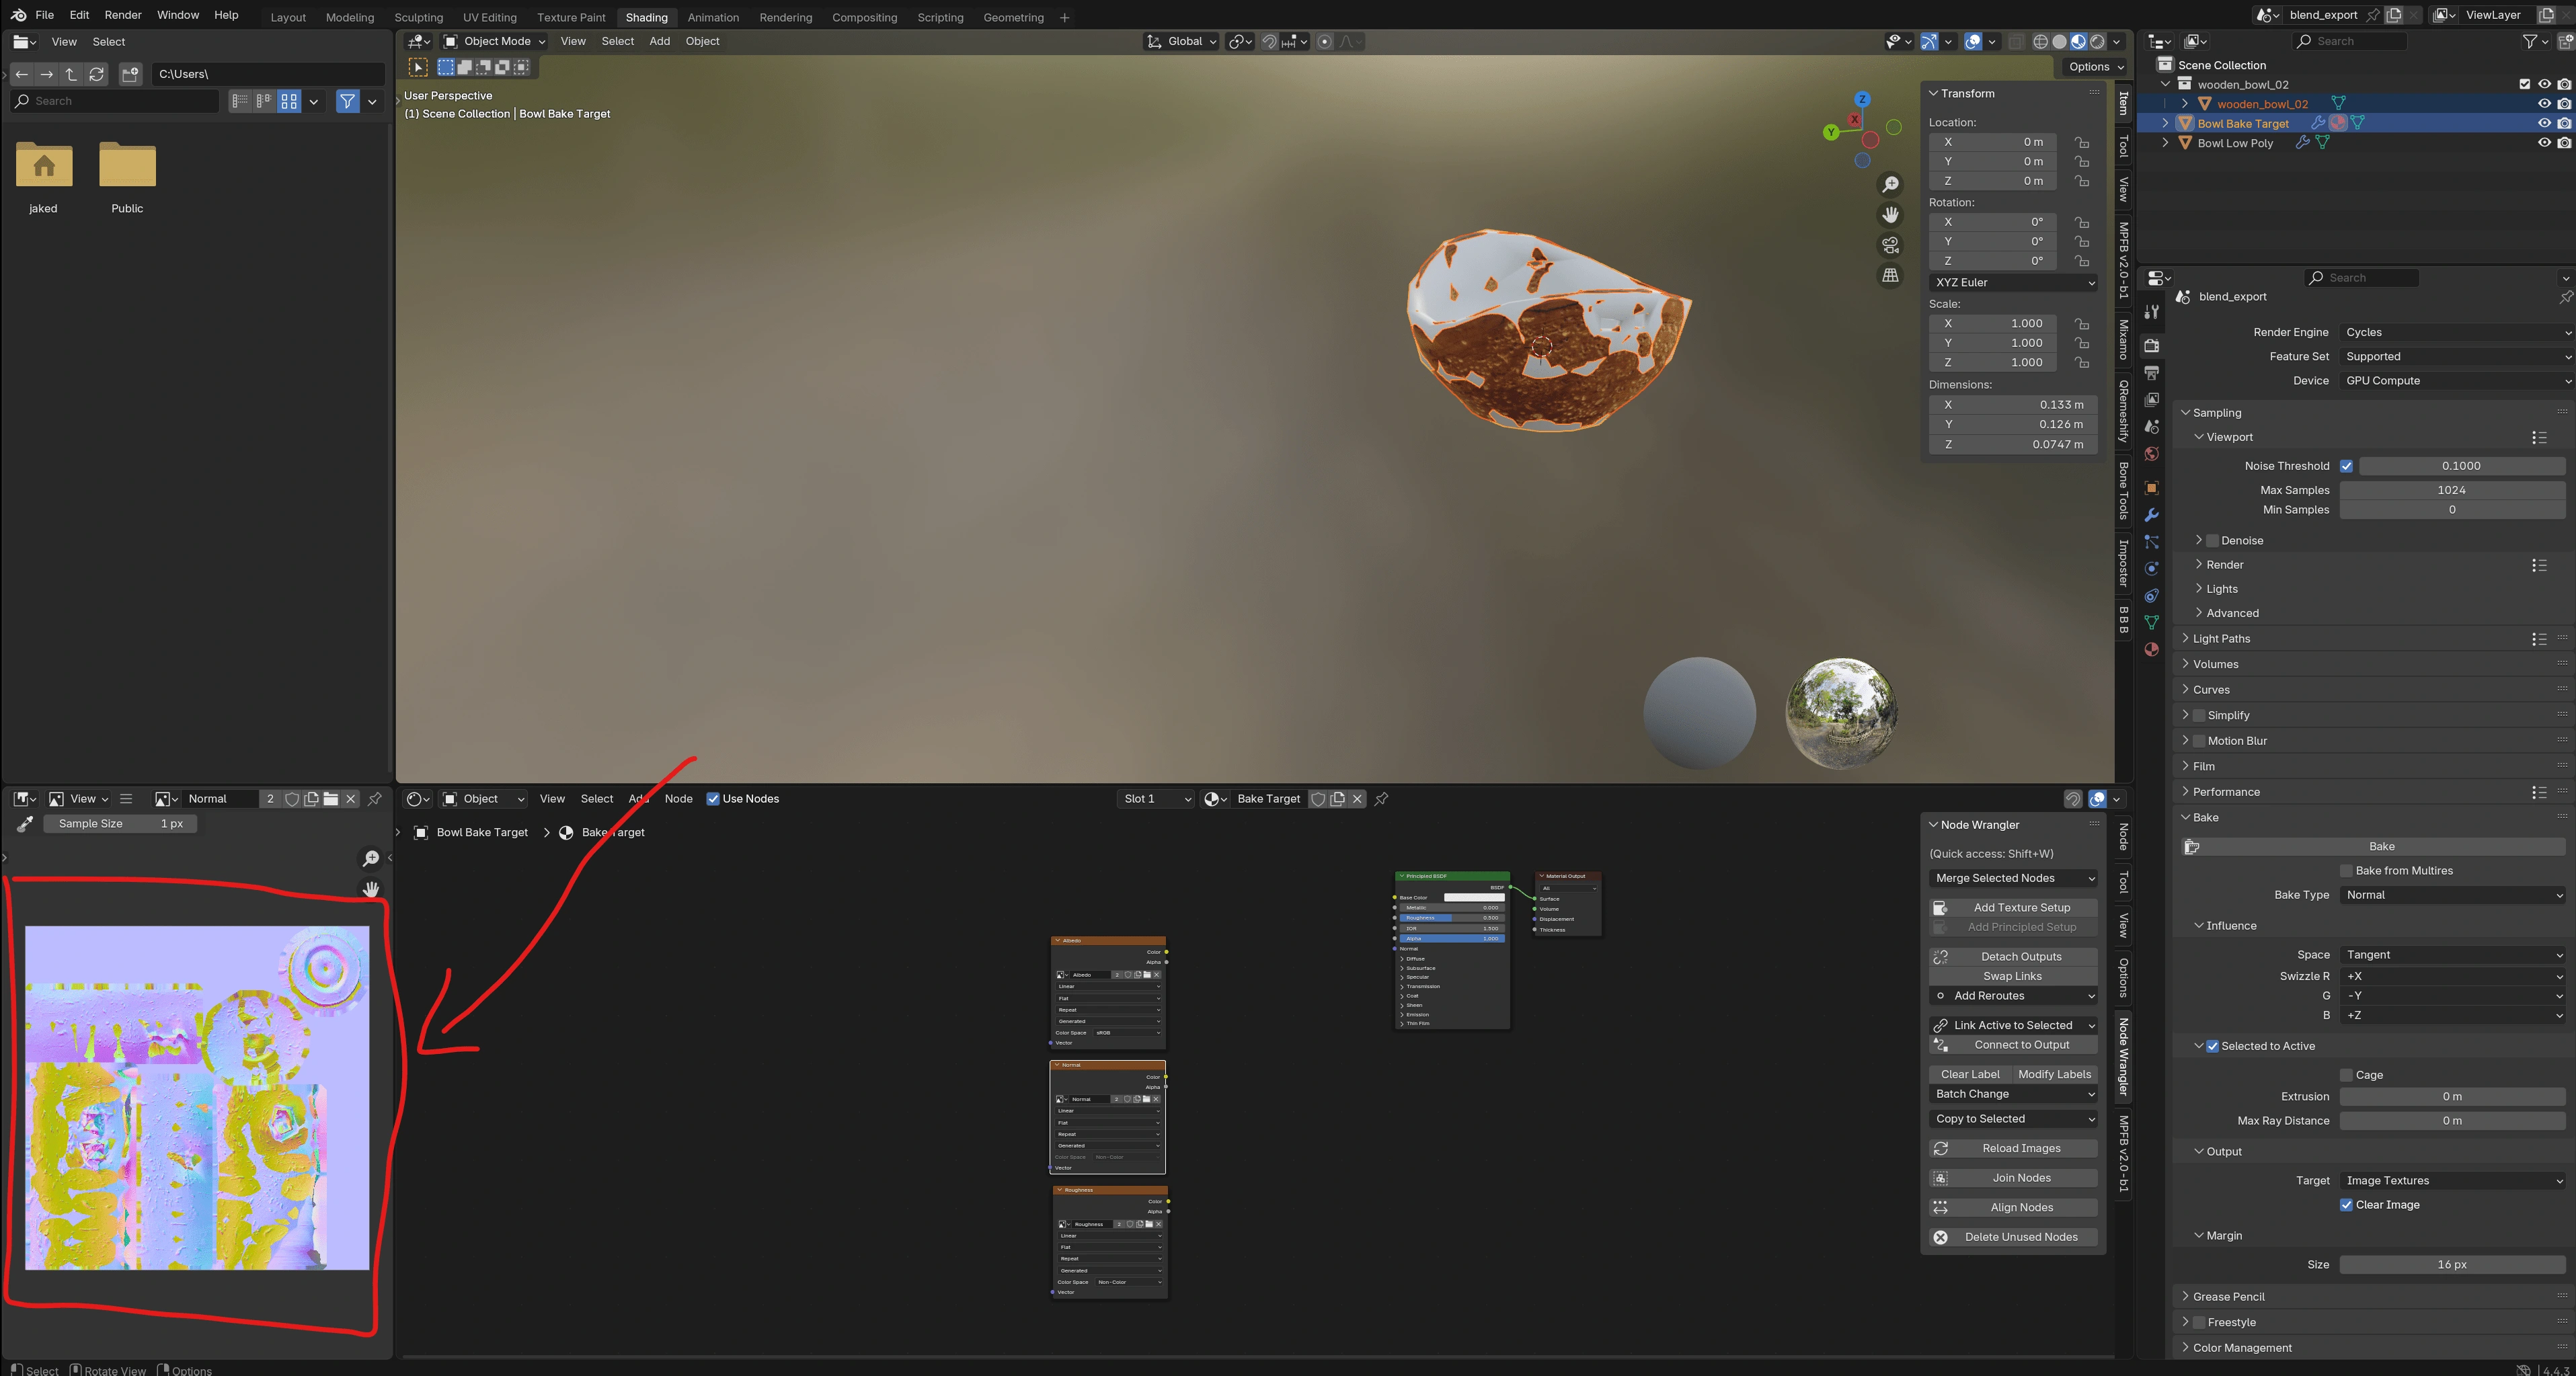
If the Max Ray Distance was too low, eg. 0.1, we would get holes in our normal map as shown above.

If our values are set properly we get a nice normal map without any artifacts.
We can also now look at our Low Poly object and see that it looks nice and bumpy. But there is one tiny problem, It's far too shiny! This is because its roughness map is entirely black or 0.0, this corresponds to a mirror like shine. So of course our next step should be to bake a roughness map.
Baking a Roughness Map

With your selection still on the high poly and your active still on the bake target select the roughness map texture node in the shader nodes editor.

Select "Roughness" for Bake Type and hit Bake again.
After waiting for the bake to complete we now have a roughness map and the shininess of our bowl looks correct. Last but certainly not least we need to bake albedo. This is the actual surface colour of our object.
Baking an Albedo Map

Just as before we need to select the Albedo texture node in the shader node editor.
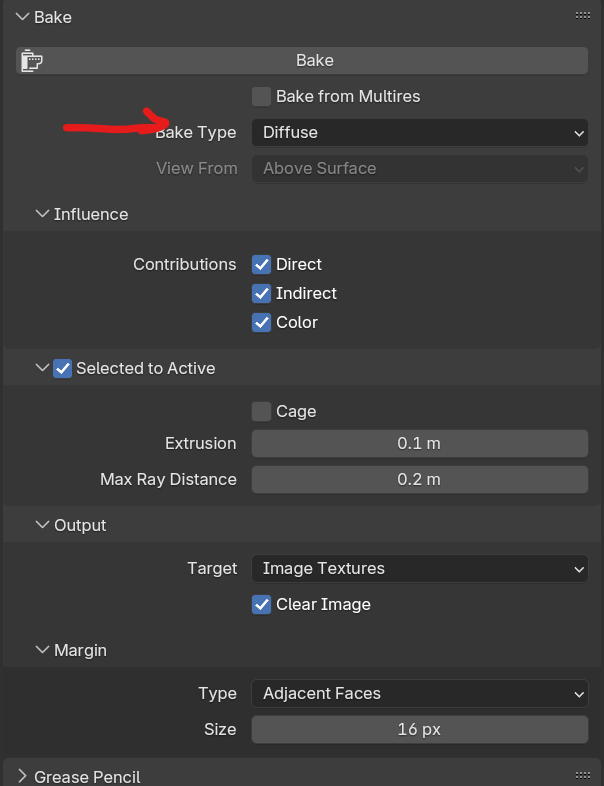
We set the Bake Type to "Diffuse" this time, but there is one more thing before you bake!

In the below the bake button under "Influence" you must uncheck "Direct" and "Indirect", otherwise blender will bake the lighting into your albedo texture. Now we can hit Bake.

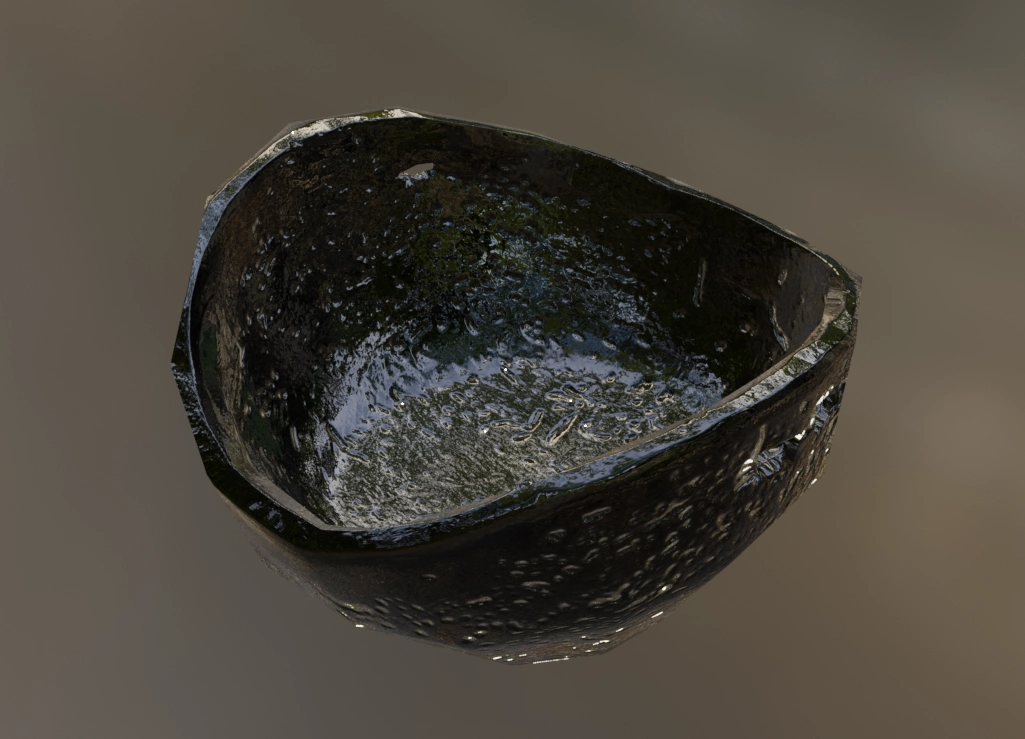
If everything went well, our bowl now has a complete material!
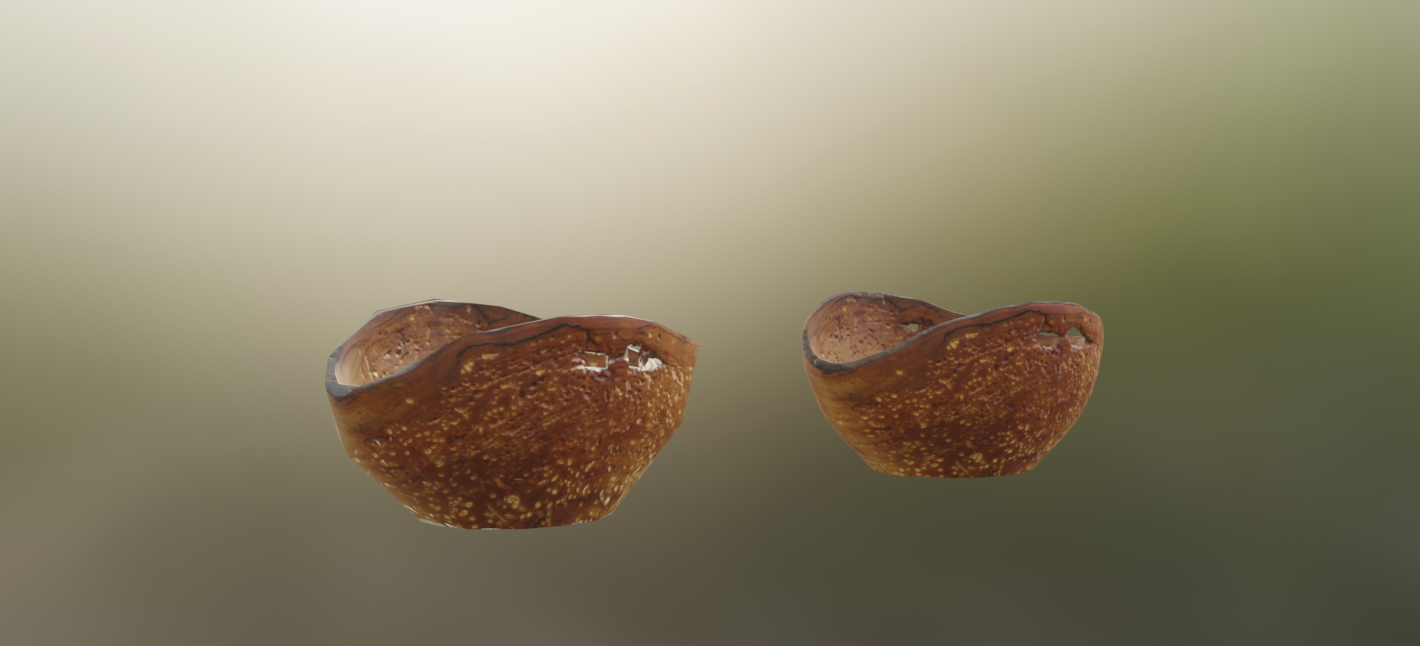
Our low poly now looks much more like the high poly one.
Even though their polygon counts are radically different.
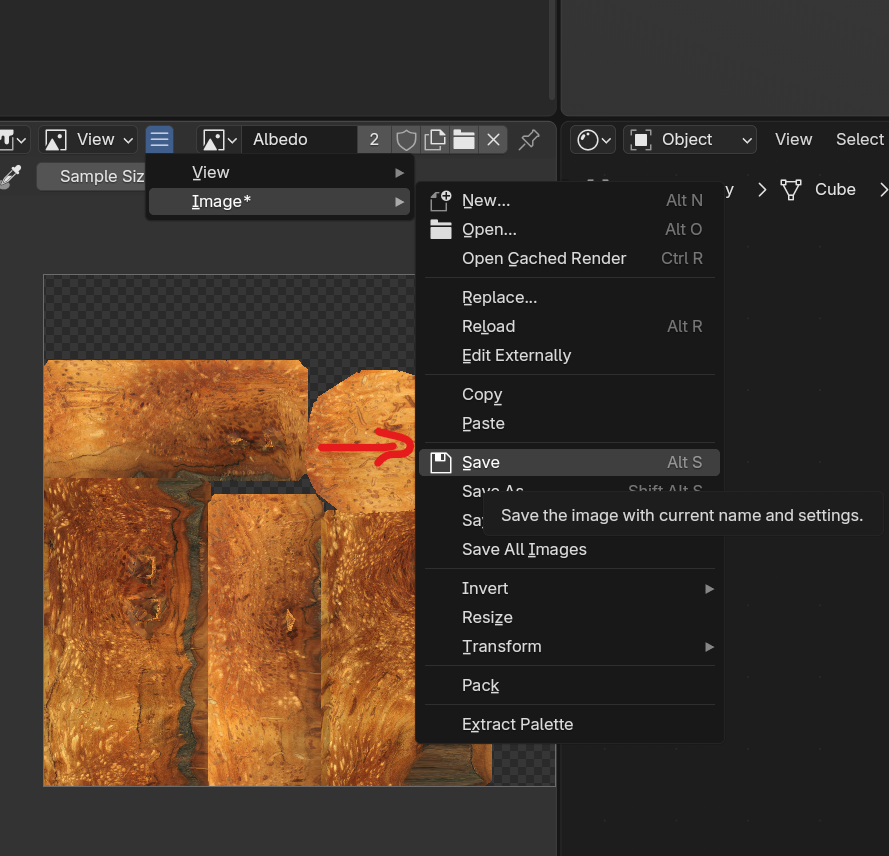
Now before I finish I need to remind you to save your textures, and for some reason Blender doesn't do this automatically for you. you can do it from the hamburger menu in the "Image Editor" under Image -> Save. This must be done for each of your textures.
There we go, that's it! That's how to bake full materials in Blender!
A Note on Metalness
There is however one tiny consideration for metallic materials. For some reason if your high poly object has any metal on it whatsoever it will completely break everything when baking. Luckily however there is a workaround.
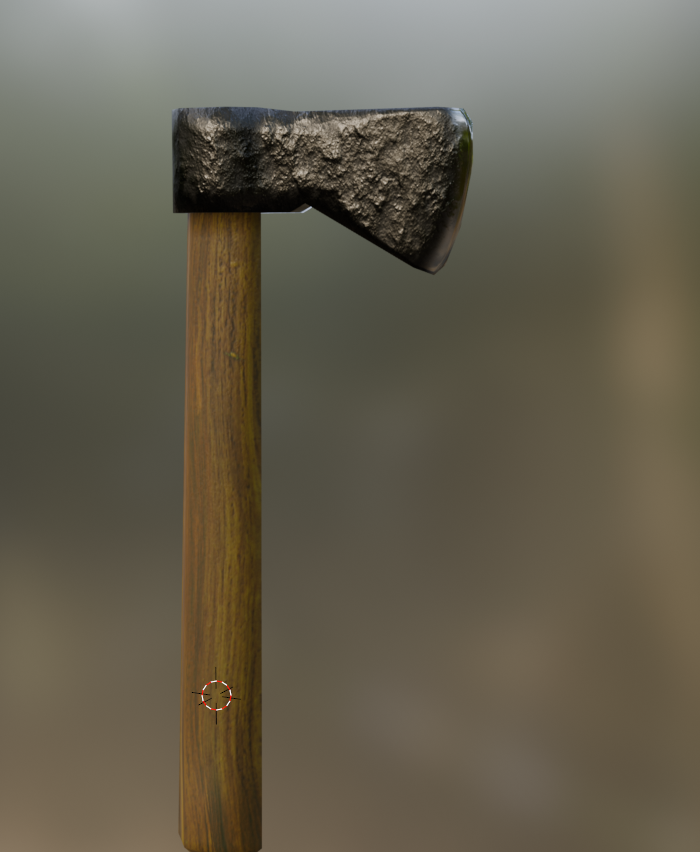
Lets use this hatchet as an example. You need to take the metallic parameter for the high poly mesh's material and hook it up to the Emission Color output.
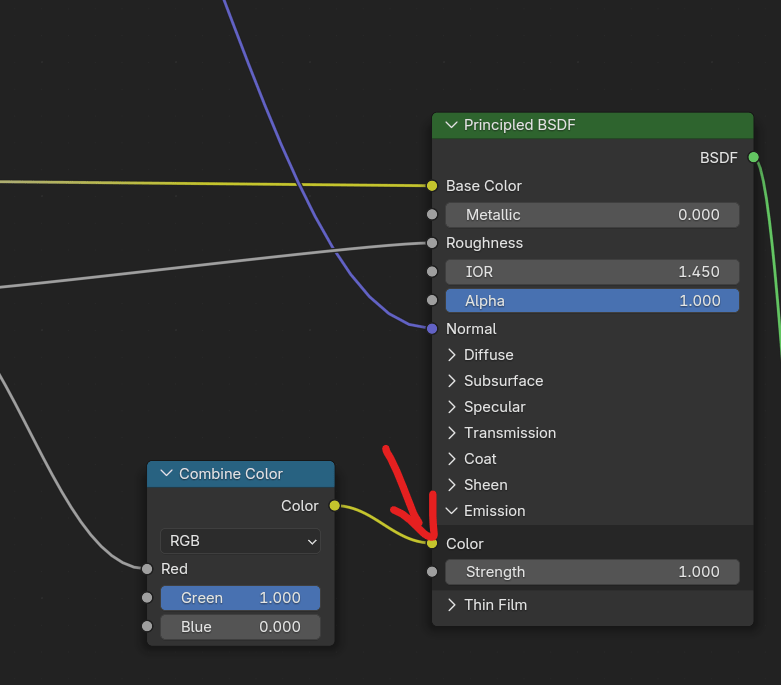
Because ASO packs roughness and metal together I'm gonna send both through the Emission color using a "Combine Color" node (Note ASO uses R = Roughness, G = Metal, this is different from glTF). All you do now is locate the correct texture in your Bake Target material and instead of baking Metal and Roughness you bake using "Emission" as the bake type instead.
Considerations for Mirrored Objects
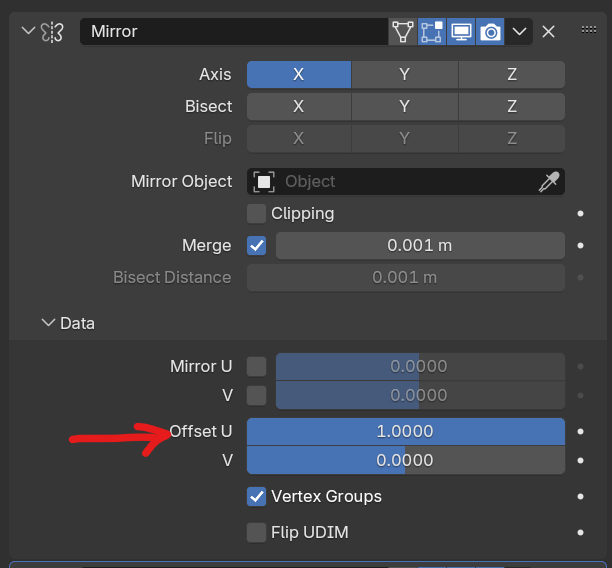
If your low poly object has a mirror modifier like the hatchet from the metal section, there is one more thing to be aware of. You should set the UV coordinate offset to 1.0 for either U or V. This will ensure the mirrored geometry generates UV coordinates that do not overlap with the ones we already have, which would have caused problems during the bake.
The End
Hope you enjoyed this tutorial! If you found it useful or wanna know about my game A Short Odyssey, please wishlist it on Steam: https://store.steampowered.com/app/2818690/A_Short_Odyssey